Breville Barista Express Setup
Step-by-step Breville Barista Express unboxing and first-time setup guide. Water filter installation, priming, and pulling your first perfect espresso shot.
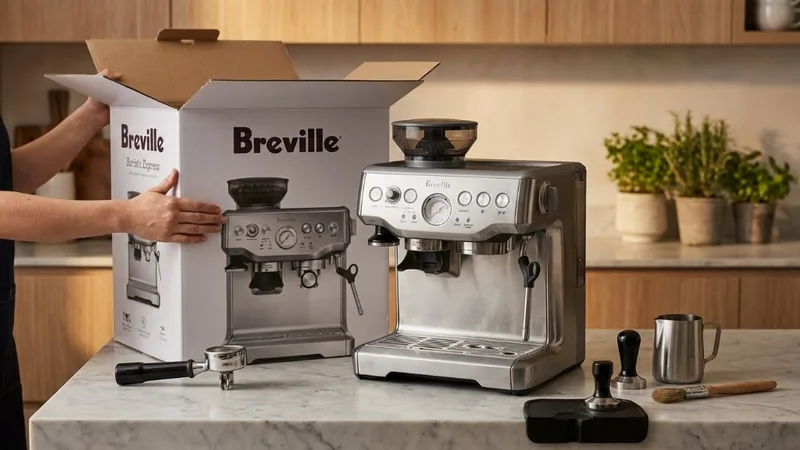
So you just unboxed a Breville Barista Express. I still remember that feeling—staring at this serious-looking machine thinking “okay, now what?” About three years ago now, and I’ve since pulled thousands of shots on it. Let me save you the trial and error I went through.
This is genuinely one of the best entry points into real home espresso. Built-in grinder, proper pressure, milk steaming—everything you need without buying separate pieces. But the first setup matters more than you’d think. Get it right and you’ll be drinking legit espresso in under an hour. Rush it and you’ll spend weeks wondering why your shots taste off.
Here’s how to do your Breville Barista Express setup properly, with actual grind settings (1-16 scale, 1 being finest), real timings, and the stuff I wish someone had told me day one.
Why Proper Setup Matters
Look, you could just plug this thing in and start pushing buttons. But here’s what happens when you skip steps: uneven grinds from day one, sour shots because there’s air trapped in the lines, bitter shots from scale buildup you could’ve prevented. It’s not pretty.
Done correctly, you’re looking at 9 bars of pressure (right in the gauge sweet spot), 25-30 second extraction times, thick crema, the works.
Why bother with all this? The built-in conical burr grinder (16 settings) and the thermocoil heater warm up in about 30 seconds, which is great. But priming the system and doing the initial calibration prevents air pockets and scale issues right from the start. Most new owners skip the water filter soaking and the initial flush—and then wonder why shot #50 tastes weird.
Follow this setup properly and you’ll dodge about 90% of the frustration I see in the forums. You’ll be pulling shots before lunch, I promise.
What’s in the Box: Full Checklist
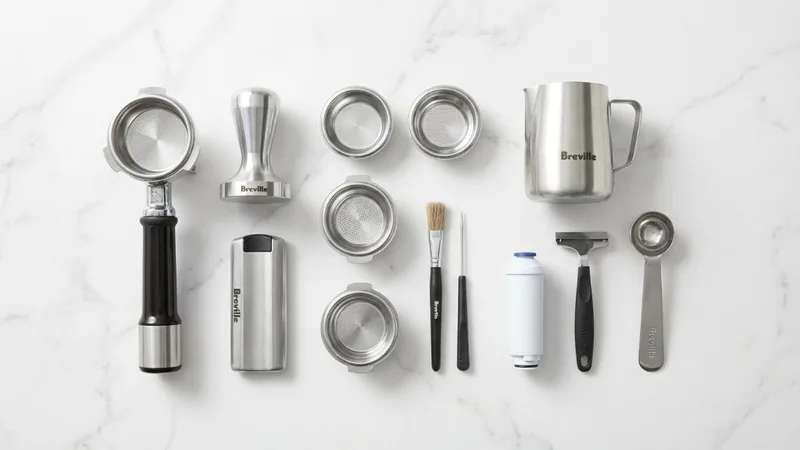
Breville packs a lot of stuff in here. Go through this checklist piece by piece—I’ve seen people miss accessories buried in the foam and not realize until weeks later:
Main Components
- The espresso machine itself (drip tray, storage tray, and tamper holder are attached)
- 54mm portafilter—stainless steel, hefty
- Bean hopper with lid—fits about 250g of beans
- Water tank—2L capacity
Filter Baskets
- Single wall single basket—7-8g dose, rarely used
- Single wall double basket—18g dose, this is your main one
- Dual wall single basket—pressurized, designed for pre-ground
- Dual wall double basket—pressurized, more forgiving for beginners
Accessories
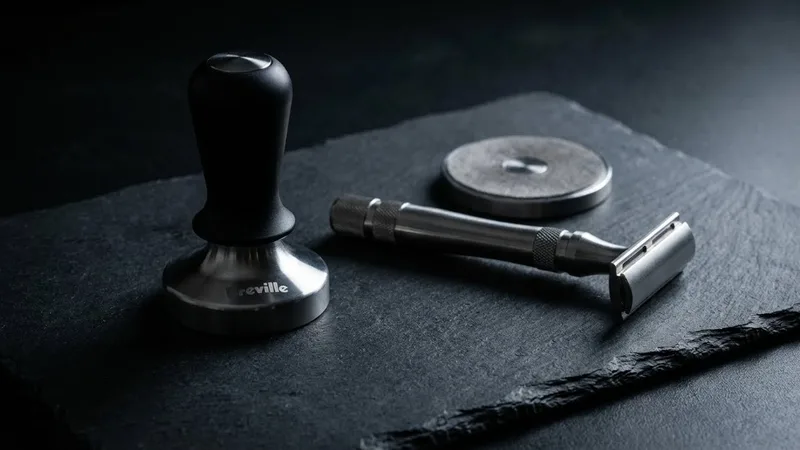
- Stainless steel tamper—it works, though you might upgrade later
- Milk frothing jug—480ml, decent starter pitcher
- Razor dosing tool—levels your grounds to consistent headspace
- Rubber cleaning disc—for backflushing
- Cleaning tablets—pack of 8
- Cleaning brush—actually useful
- Cleaning pin—tiny tool for steam wand tip
- Water filter—charcoal cartridge, don’t skip this
- Water hardness test strip—actually use it
Documentation
- Quick start guide
- Full instruction manual
- Warranty card
Keep the box for at least 30 days. If something’s defective, you’ll need it. Missing parts? Call Breville right away.
Step 1: Unboxing and Initial Inspection
Before you do anything else, make sure this thing arrived intact.
Remove All Packaging
- Lift the machine out carefully—it’s heavier than it looks
- Peel off all the tape, stickers, protective films (there’s one on the drip tray that’s easy to miss)
- Check inside the bean hopper—foam packaging hides in there
- Pull out the cardboard insert from the water tank area
Inspect for Damage
- Any dents, scratches, or cracks?
- Does the portafilter lock in smoothly?
- Steam wand should swing freely
- Drip tray should slide in and out without resistance
Position Your Machine
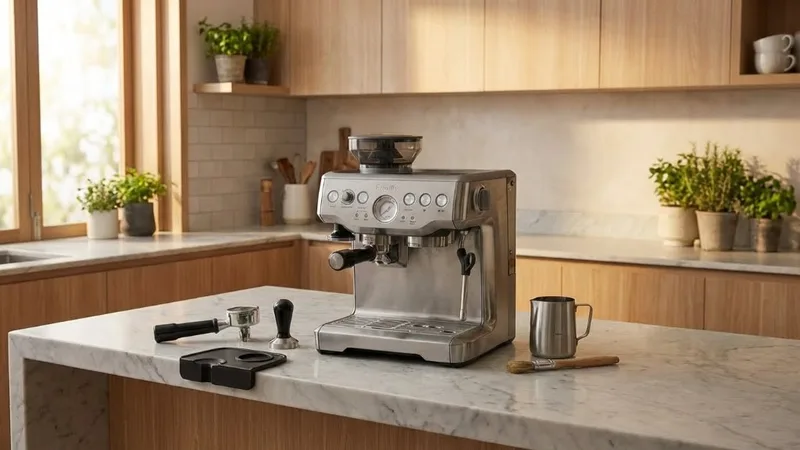
Pick your spot wisely:
- Stable, level surface (wobbly = uneven extraction)
- At least 4 inches clearance on each side for ventilation
- Near a power outlet, obviously
- Away from the sink and out of direct sunlight
This thing weighs about 12kg (26lbs)—once you put it somewhere, it’s staying there. I moved mine three times before settling on the current spot. Learn from my mistake and figure out your ideal location now.
Step 2: Installing the Bean Hopper
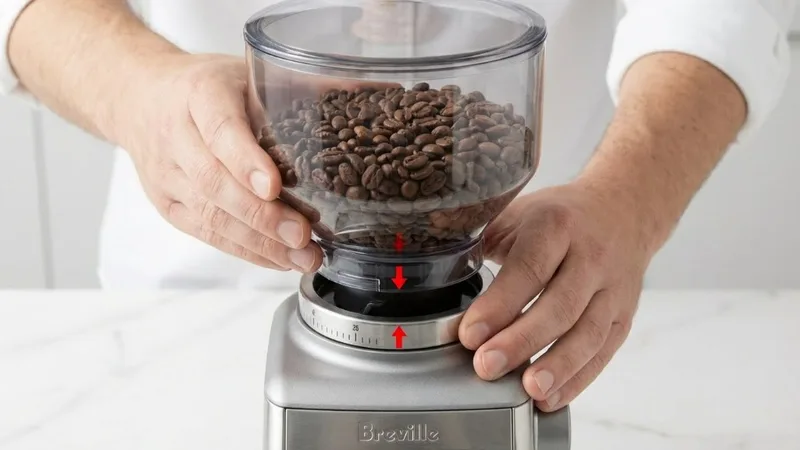
The integrated grinder is honestly one of the best things about this machine. Here’s how to set it up:
Lock the Hopper in Place
- Take off the hopper lid
- Line up the hopper over the grinder opening—there are alignment marks
- Push down and rotate clockwise until it clicks
- Try lifting it gently—should be locked solid
Initial Grind Settings
The grind dial is inside the hopper. You’ll dial this in based on your specific beans, but here’s a starting point:
| Bean Type | Starting Grind Setting |
|---|---|
| Light roast | 4-5 (finer) |
| Medium roast | 5-6 |
| Dark roast | 6-7 (coarser) |
| Oily beans | 7-8 (prevent clogging) |
Important: Only adjust the grind dial while the grinder is actually running. Adjusting when static can damage the burrs—learned this the nervous way after reading the manual too late.
Add Your Coffee Beans
- Fresh beans are key—look for 1-4 weeks from roast date
- Fill the hopper but don’t go past the max line
- Put the lid back on securely
- Avoid super oily dark roasts for your first runs—they can gunk up a new grinder
Step 3: Water Tank Setup
Water quality affects both taste and how long your machine lasts. Don’t skip this.
Test Your Water Hardness
- Find the test strip Breville included
- Dip it in your tap water for one second
- Wait 30 seconds
- Match the color to the chart on the packaging
- Write down your hardness level (1-4)
I tested my water at level 3—turns out my tap water is harder than I thought. Would’ve been dealing with scale issues for months if I’d skipped this.
Program the Hardness Setting
- Power on the machine
- Hold PROGRAM for about 3 seconds
- Use 1-cup/2-cup buttons to pick your hardness level
- Press PROGRAM to save
This programs when the machine bugs you about descaling. Worth the 30 seconds to get it right.
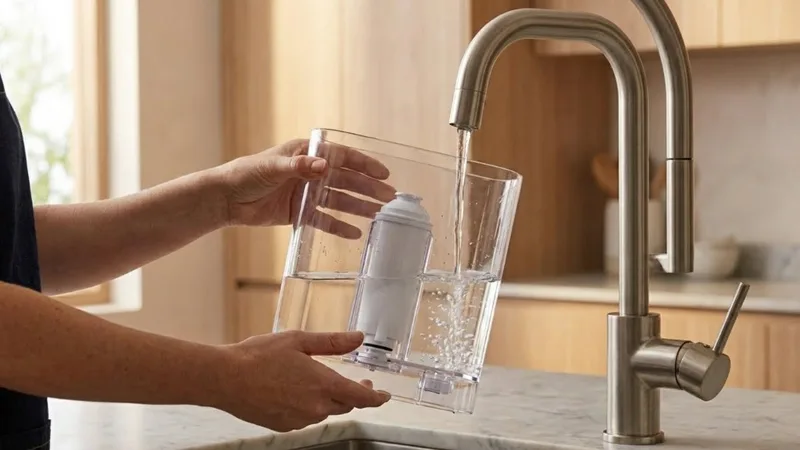
Install the Water Filter
This is where most people mess up:
- Unwrap the filter from its packaging
- Soak it in cold water for 5 full minutes—seriously, don’t skip this
- Shake it gently to get air bubbles out
- Rotate the date dial to the current month
- Drop the filter into the holder
- Place the holder in the bottom of the tank
- Fill with fresh cold water up to the MAX line
Replace every 2 months or roughly 60 liters. Set a reminder on your phone—future you will appreciate it.
Step 4: Powering On and Priming
Alright, here’s where things get exciting.
First Power On
- Double-check that water tank is full and clicked into place
- Plug her in
- Hit the POWER button
- Heating light will flash while the thermocoil warms up
- Give it 30-45 seconds until lights go steady
Prime the Water System
This flushes air out of the lines and clears any residue from manufacturing:
- Lock the empty portafilter in (you don’t need a basket in it yet)
- Put a cup or container underneath
- Press 2-cup button
- Let water run for 10-15 seconds
- It might sputter at first—totally normal, that’s the air escaping
Purge the Steam Wand
- Container under the steam wand
- Crack the steam dial open slightly
- Let steam and water blow through for 5 seconds
- Close the dial
- Wipe down the wand with a damp cloth
Done. Machine is primed and ready to actually make espresso.
Step 5: Your First Espresso Shot
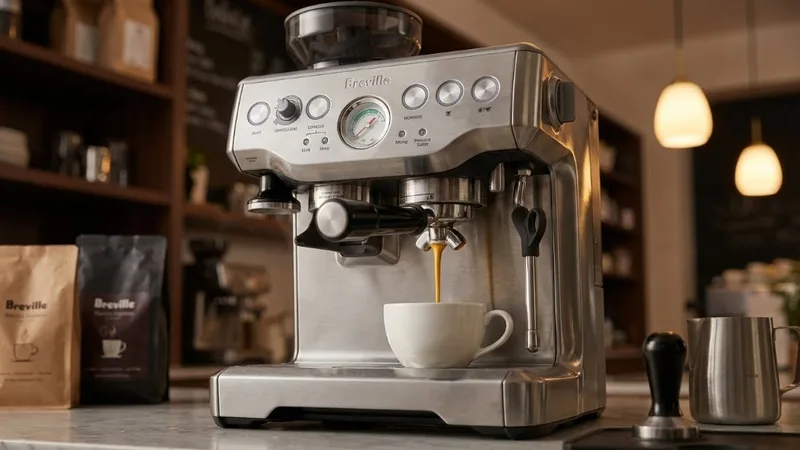
This is the moment. I was so nervous my first time—overthought every step. Don’t be me. Just follow the process:
Grind Your Coffee
- Put the double wall double basket in the portafilter (most forgiving for beginners)
- Position portafilter under the grinder chute
- Press it into the cradle to activate the grinder
- It’ll run for roughly 3-4 seconds
- You’re aiming for 18-19g in the double basket
Distribute and Tamp
- Run the razor tool across the top to level the grounds
- Light tap on the counter to settle everything
- Grab the tamper like you’re opening a door (not like you’re doing push-ups)
- Press straight down with firm pressure—people say 30lbs but honestly, consistent is more important than exact
- Slight twist at the end to polish
- Should look level and smooth
Lock and Extract
- Insert portafilter into the group head
- Rotate until it’s snug—firm but don’t force it past the stopping point
- Get your cup(s) in position
- Hit 2-cup button right away
- Watch that pressure gauge—you want it in the “espresso zone”
- Target: 25-30 seconds for about 60ml (2oz)
Evaluate Your Shot
- Ran too fast (under 20 seconds)? Go finer on grind or add more coffee
- Ran too slow (over 35 seconds)? Go coarser or use less coffee
- Gauge reading low? Finer grind or harder tamp
- Gauge reading high? Coarser grind or less dose
That’s it. You just pulled a real espresso shot. First one’s rarely perfect, but you’ll get there fast.
Running the Initial Cleaning Cycle
Before you go shot-crazy, run the cleaning cycle once. Factory residue is real.
Why Clean Before First Use?
- Clears out factory lubricants and manufacturing dust
- Gets rid of any shipping debris
- Starts you off with good maintenance habits
- Means your actual first shots taste like coffee, not machine
Cleaning Cycle Steps
- Put the single wall 1-cup basket in the portafilter
- Drop in the rubber cleaning disc
- Add one cleaning tablet on top
- Lock portafilter into group head
- Hold 1-CUP and 2-CUP buttons together for 3 seconds
- Machine runs its cleaning cycle—takes about 5 minutes
- You’ll hear it pulsing water through multiple times
After the Cycle
- Pull out portafilter, toss the dissolved tablet residue
- Rinse basket and portafilter under running water
- Lock empty portafilter back in
- Run 2-cup cycle twice to flush
- Wipe around the group head
Now your machine is actually clean and ready for daily use.
Troubleshooting Common First-Time Issues
Even following everything perfectly, stuff happens. Here’s what I’ve dealt with:
Machine Won’t Turn On
- Test the outlet with something else (phone charger, whatever)
- Make sure water tank is fully seated—there’s a safety switch
- Try a different outlet
- Wait a few seconds and try again
No Water Flow Through Group Head
- Tank probably isn’t clicked in properly—reseat it
- Air in the system—run hot water for 30 seconds
- Check that water filter is installed right
- If you’re in a hard water area, might need early descaling
Grinder Won’t Grind
- Is the hopper actually locked? Twist clockwise
- Oily beans can jam—check for clumps
- Grinder has a safety cutoff when hopper’s removed
- Obvious but: are there actually beans in there?
Weak or Watery Espresso
- Grind finer (adjust while grinding)
- Bump dose up to at least 18g
- Tamp harder and more evenly
- Check your beans—how old are they really?
Machine Making Strange Noises
- Gurgling during heating is normal
- Clicking is the thermostat doing its thing—normal
- Grinding sounds with no grinding = beans stuck, clean hopper
- Loud vibrating = air in pump, prime it again
Pro Tips for New Breville Barista Express Owners
Things I figured out after about six months of daily use:
Dial In Each New Bag
Every bag is different. I spend 2-3 shots dialing in when I open fresh beans. Yeah, it uses some coffee. Worth it for the rest of the bag tasting right.
Start a Shot Journal
Sounds nerdy but it works. Grind setting, dose, time, how it tasted. After a dozen entries you’ll start seeing patterns and preferences you didn’t know you had.
Use Fresh Beans
The machine isn’t the limiting factor—your beans are. Find a local roaster, check that roast date, try to use within 4 weeks. Grocery store beans with “best by” dates instead of “roasted on” dates are a red flag.
Master the Pressure Gauge
That gauge tells you a lot:
- Left of the zone = under-extracted, grind finer
- In the zone = you’re dialed in
- Right of the zone = over-extracted, grind coarser
Upgrade the Basket
Stock baskets are fine to start. When you’re ready, an IMS precision basket ($25 or so) noticeably improves consistency. Not essential, but a nice upgrade down the road.
Keep It Clean
- Wipe steam wand immediately after every use—milk residue hardens fast
- Weekly backflush with cleaning tablets
- Descale every 2-3 months depending on your water
- Monthly grinder cleaning
Milk Steaming Basics
Once you’re ready for lattes:
- Purge steam wand first (quick burst)
- Cold milk in cold pitcher
- Position tip just under the surface to create that whirlpool
- Listen for the tearing-paper sound—that’s the sweet spot
- Stop when pitcher’s too hot to hold comfortably (60-65°C)
- Tap and swirl to knock out big bubbles
FAQs
What’s the ideal grind size for Breville Barista Express?
For medium roast, start around 5-6. Darker roasts might need 7-8, light roasts might need 3-4. The real answer: whatever gives you 25-30 seconds extraction time. Every bean is different—don’t expect one setting to work for everything.
How long does the full setup take?
From opening the box to sipping espresso? About 20-25 minutes if you’re thorough, including priming and the cleaning cycle. After initial setup, each shot takes like 2-3 minutes.
Do I really need the water filter?
If you have hard water (over 100ppm), absolutely. Even moderate hardness, yes. The filter removes chlorine and slows scale buildup significantly. Soak it for 5 minutes first—that step matters.
Should I use single or double baskets?
Start with the double basket. Bigger coffee bed extracts more evenly and is more forgiving of imperfect technique. Single basket is finicky—save it for later when you know what you’re doing.
Why isn’t my machine heating up?
First thing: is the water tank actually seated? There’s a safety switch. If lights are flashing, just wait—give it 30-45 seconds. If absolutely nothing happens, try another outlet. Still dead? Might need a descale or a call to Breville.
Key Takeaways
- Go through the box systematically—use the checklist, don’t miss buried accessories
- Soak that water filter for 5 minutes—not optional
- Prime everything—run water through group head and steam wand before your first shot
- Start at grind setting 5-6—adjust based on extraction time from there
- Aim for 25-30 seconds—gauge in the espresso zone
- Run the cleaning cycle first—gets rid of factory residue
- Expect a learning curve—5-10 shots to really dial it in
Your Breville Barista Express setup is done. You’ve got everything you need for genuine café-quality espresso at home now. There’s definitely a learning curve—don’t get discouraged by the first few mediocre shots. Within a week you’ll be pulling shots that make you wonder why you ever paid $6 at coffee shops.
Questions as you go? Check our guides on descaling your Breville, fixing low pressure issues, and mastering milk steaming.
Now go pull some shots. ☕
Mikael
Home espresso enthusiast and Breville specialist. Helping you master the art of coffee brewing from your own kitchen.
Learn more about me →