Breville Espresso Upgrades Guide
Best upgrades for your Breville espresso machine. From precision tampers to bottomless portafilters—what's worth buying and what to skip.
Six months after buying my Barista Express, I fell down the upgrade rabbit hole. It started innocently—a nicer tamper. Then a precision basket. Then a bottomless portafilter. Before I knew it, I’d spent $300 on accessories.
Was it worth it? Some upgrades genuinely improved my shots. Others were expensive lessons in marketing hype.
If you’re looking at Breville upgrades and wondering what actually matters, I’ve tested most of the popular options. Let me save you money and frustration.
Essential First Upgrades
These are the upgrades that immediately improved my espresso. If you’re only going to spend $50-100, prioritize these.
Precision Tamper ($30-60)
The stock Breville tamper is… fine. But it’s slightly undersized (53.5mm vs the 54mm basket), and the plastic handle makes consistent tamping harder.
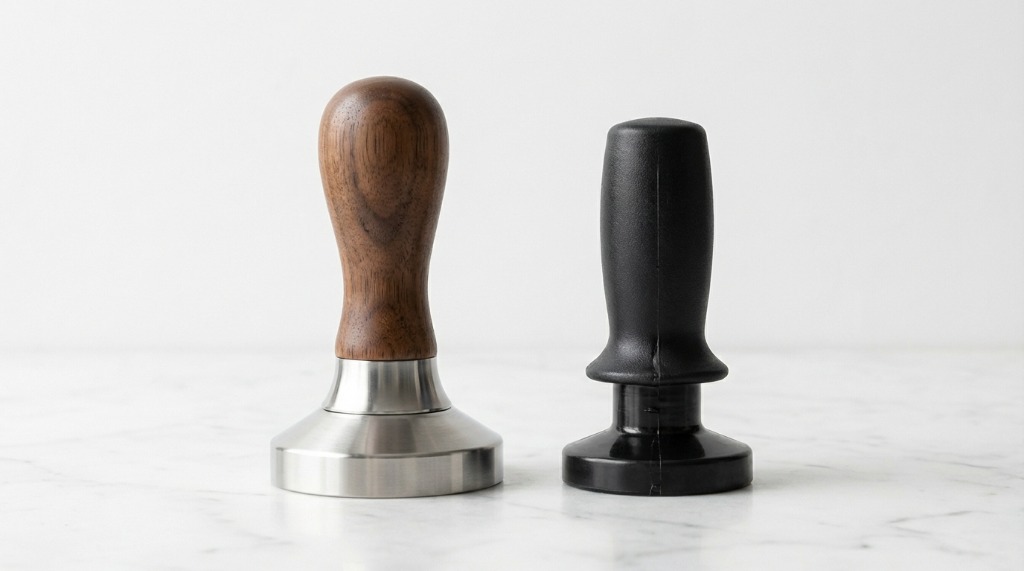 A comparison between a custom 54mm precision tamper (left) and the stock Breville tamper (right).
I switched to a Normcore V4 spring-loaded tamper (about $45). The spring means I get exactly the same pressure every tamp—no more guessing. My shots became noticeably more consistent within a week.
What to look for:
- 54mm diameter (fits Breville baskets perfectly)
- Spring-loaded for consistent pressure (optional but nice)
- Comfortable handle weight
Budget pick: The $20 aluminum tampers on Amazon work fine if you master your tamping technique. I used one for months before upgrading.
For proper technique, check my tamping technique guide.
Precision Basket ($20-40)
This was the single most impactful upgrade I made.
Stock Breville baskets are good, but precision baskets (like IMS or VST) have perfectly uniform holes laser-cut into them. Water flows more evenly through the puck, reducing channeling and improving extraction.
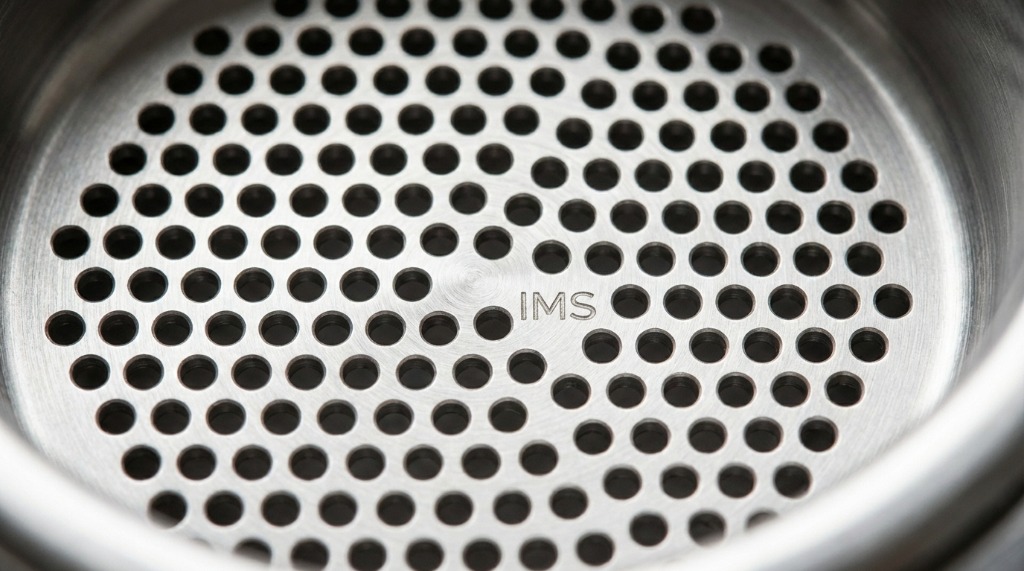 A close-up of the IMS precision basket, showing the uniform, laser-cut hole distribution that prevents channeling.
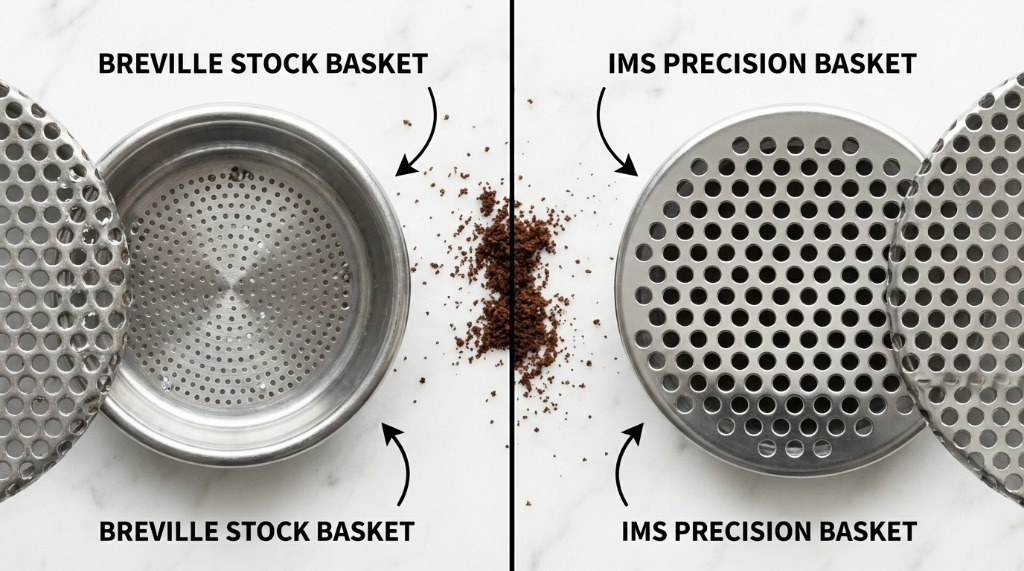 Comparing the hole density and uniformity between the stock Breville basket (left) and an IMS precision basket (right).
I bought an IMS 18g basket for about $25. First shot with it? Noticeably sweeter, more balanced. Channeling issues I’d been fighting for months disappeared.
Recommended baskets:
- IMS Competition Series (18g or 20g)
- VST Precision Basket (18g ridged or ridgeless)
- Normcore precision baskets (budget option)
These fit all Breville 54mm portafilters—Express, Pro, Touch, Dual Boiler.
See my dosing baskets guide for more details on sizing and fit.
WDT Tool ($10-25)
WDT stands for “Weiss Distribution Technique”—basically, using thin needles to stir and distribute grounds before tamping. It breaks up clumps and creates a more even puck.
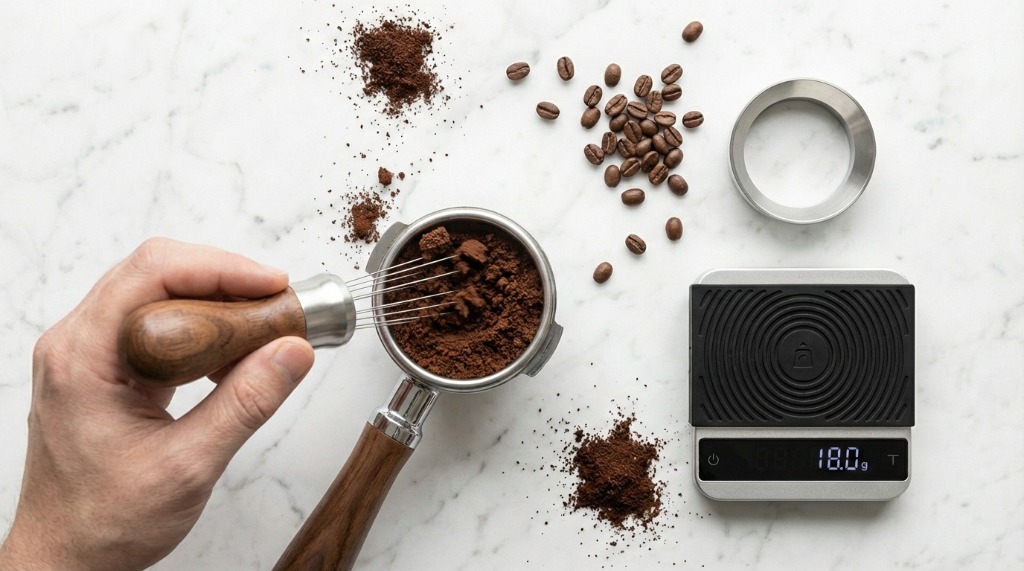 Using a WDT tool to break up clumps and ensure an even distribution before tamping.
I made my own from a cork and acupuncture needles for about $5, but commercial options like the Decent Espresso WDT or Normcore tools are convenient.
Does it matter? For light roasts that clump heavily, absolutely. I saw immediate improvement in extraction consistency. For dark roasts that flow freely, the difference is smaller.
My routine: Grind into portafilter, WDT for 5 seconds, light tap on counter, tamp. Takes 10 extra seconds, reduces channeling significantly.
Bottomless Portafilter ($35-60)
A bottomless (or “naked”) portafilter removes the spouts, letting you watch your extraction directly. This is equal parts diagnostic tool and espresso porn.
Why it matters: You can SEE channeling. If coffee squirts sideways instead of dripping evenly, you know something’s wrong with your puck prep. It’s incredibly useful for improvement.
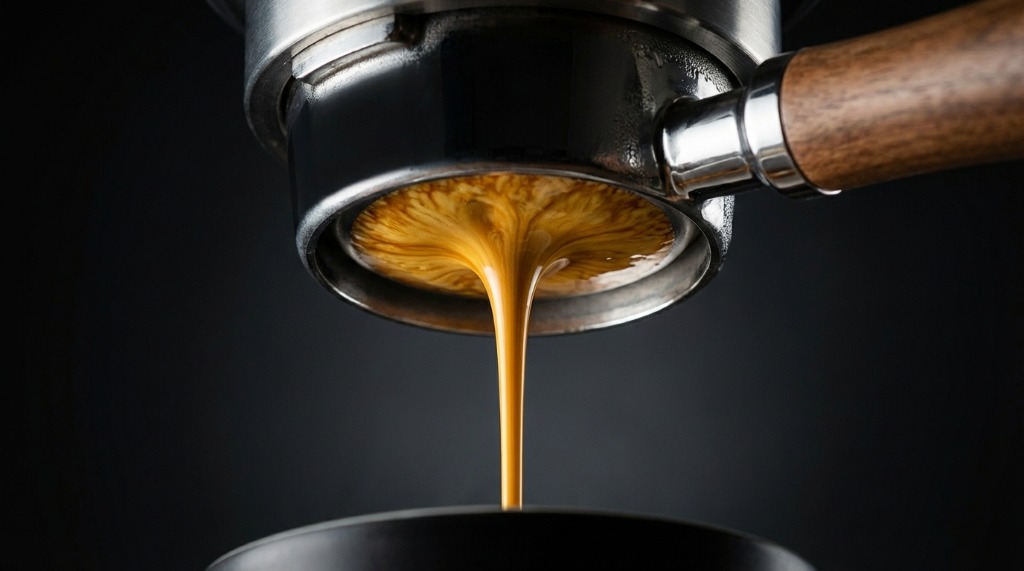 A bottomless portafilter provides immediate visual feedback on the quality of your puck preparation.
I bought a generic 54mm bottomless portafilter for $40. It came with a decent basket, though I replaced it with my IMS precision basket.
Warning: Bottomless portafilters are messier. If your puck prep is bad, espresso sprays everywhere. My first few attempts decorated my countertop beautifully. Keep paper towels handy.
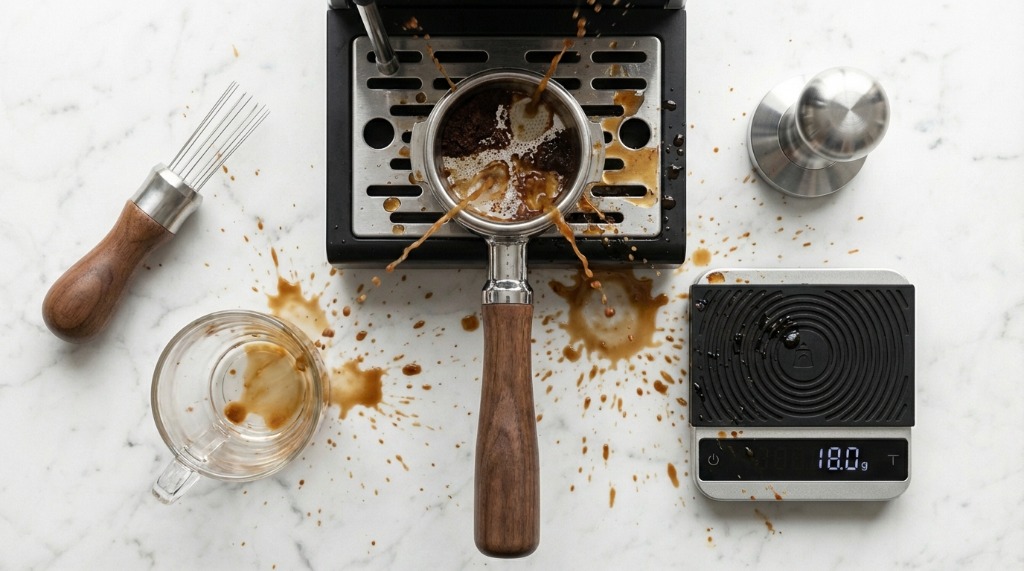 When puck prep goes wrong, a bottomless portafilter will spray coffee in all directions—this is why WDT and level tamping are essential.
Performance Boosters
These upgrades cost more but can significantly enhance machine performance.
Precision Pressure Gauge (Dual Boiler Only)
If you have a Dual Boiler, you can replace the stock pressure gauge with a more accurate one. The stock gauge works but isn’t super precise.
I haven’t done this upgrade personally—my stock gauge is fine for my needs. But enthusiast forums rave about the improved feedback.
Skip if: You have an Express or Pro. Those machines’ gauges are less critical since extraction is more visually guided.
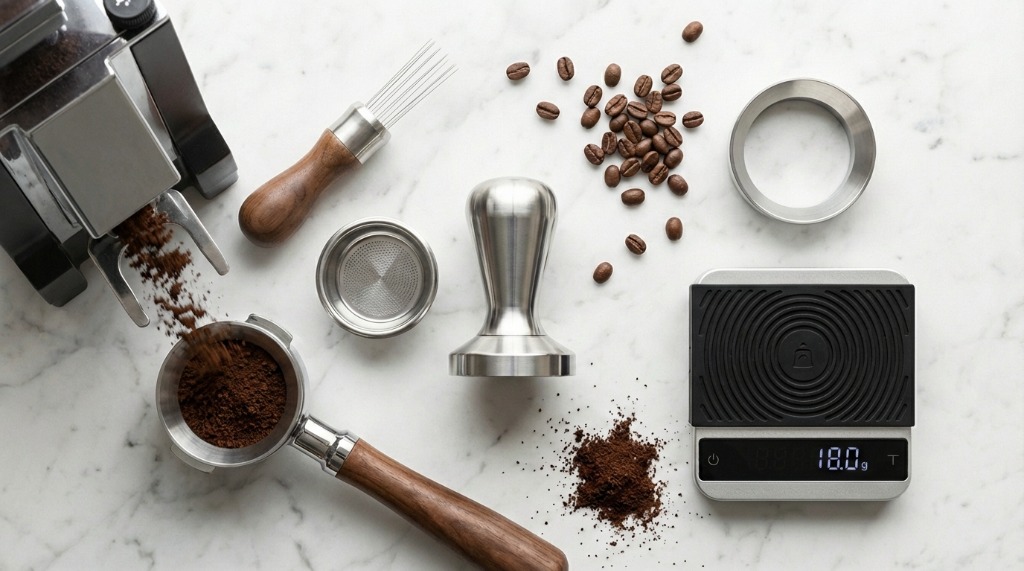
Scale ($15-50)
Not exactly a Breville upgrade, but absolutely essential. Weighing your dose in and espresso out changes everything.
I use an Acaia Lunar (expensive at $200+) but honestly, any scale that’s fast, accurate to 0.1g, and fits under your cup works. The Timemore Black Mirror ($50) is the sweet spot for most people.
My workflow: 18g in, 36-40g out, 25-30 seconds. Without a scale, you’re guessing.
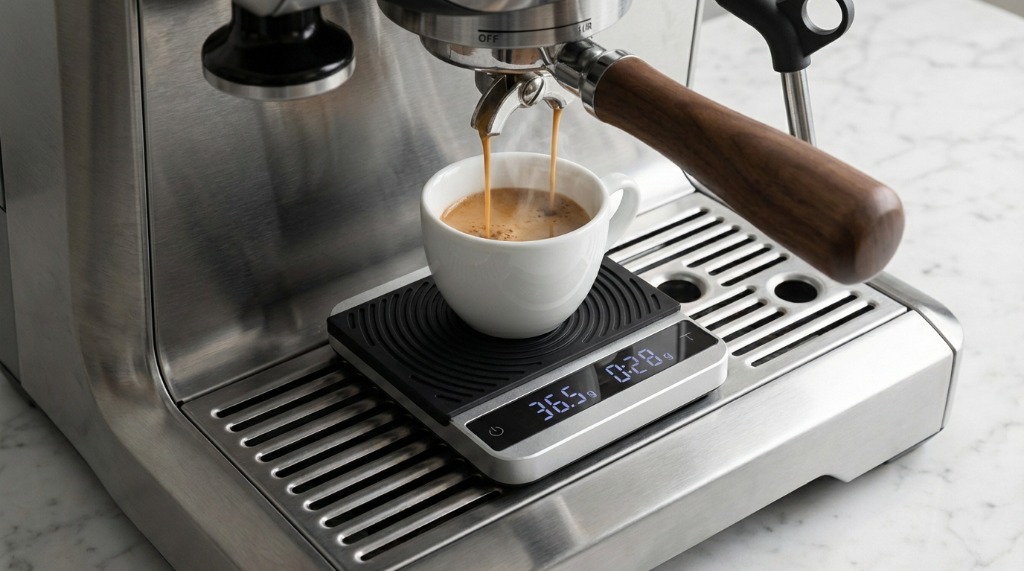 Using a slim scale like the Timemore Nano allows you to monitor yield in real-time, even with limited drip tray space.
For why this matters, see my weighing espresso output guide.
Dosing Funnel ($10-20)
A simple plastic or metal ring that sits on your portafilter during grinding. Keeps grounds from spilling everywhere, especially if your grinder is messy.
 A dosing funnel prevents coffee grounds from spilling over the edge of the portafilter during grinding.
I used to lose 0.5-1g per shot to counter spray. A $12 dosing funnel fixed that completely. Plus, it makes WDT easier since you’re not worried about grounds escaping.
Distribution Tool ($20-40)
These spinning tools level your grounds before tamping. Popular options include the OCD (Ona Coffee Distributor) and various Amazon clones.
Honest take: I bought one, used it for a month, and went back to WDT + tamp. For me, WDT alone provided all the distribution I needed. Some people swear by distributors; I find them unnecessary if your WDT technique is solid.
Maybe buy if: You find yourself rushing through puck prep. Distributors are faster than WDT.
Upgrades to Skip (Or Delay)
Not everything marketed as an upgrade is worth your money. Here’s what I’d avoid:
Expensive “Precision” Tamper Stands
They look nice on Instagram but add zero to your coffee quality. I bought a $40 walnut tamper stand. It’s pretty. My shots taste exactly the same.
Machine Mods (PID Installation)
The Express, Pro, and Touch already have temperature control. Adding an aftermarket PID is expensive, voids your warranty, and provides minimal benefit.
The Dual Boiler has dual PID controls from the factory—you can adjust brew temperature to the degree.
Exception: If you have an older Breville Infuser without good temp control, a PID mod might make sense. For anything Express-level or above, skip it.
Third-Party Steam Tips
The stock steam wands work fine. Different tip designs change steam behavior, but honestly? Learn proper technique with the stock tip before spending money here.
I tried a 4-hole tip on my Express. Marginally faster steaming, slightly different texture. Not worth the $20 for most people.
”Upgraded” Drip Trays
Some companies sell custom drip trays with fancier materials. They collect drips exactly like the stock tray. Save your money.
Bottomless Portafilter Wood Handles
Aesthetically gorgeous. Functionally identical to the stock handle. If you have $50 to burn on looks, go for it. Otherwise, keep the stock handle and spend that money on a precision basket.
My Recommended Upgrade Order
If I were starting over, here’s how I’d spend my money:
Month 1 ($50-70):
- Precision basket (IMS or VST) - $25
- Scale (Timemore Black Mirror) - $45
Month 2 ($45-70): 3. Precision tamper (Normcore V4) - $45 4. WDT tool - $15
Month 3 ($40-60): 5. Bottomless portafilter - $40 6. Dosing funnel - $15
Total: $135-215 for everything that genuinely matters.
After that, you’re into diminishing returns. The remaining improvements come from technique, bean quality, and water chemistry—not more accessories.
Maintenance After Upgrades
New accessories need care too:
Precision Baskets
Check the holes monthly for clogs. Soak in Cafiza solution during normal cleaning cycles. The uniform holes can clog faster than stock baskets if you’re not cleaning regularly.
Bottomless Portafilters
Wipe the basket area after each use. Coffee residue builds up where spouts used to redirect it. I give mine a quick rinse every few shots.
Tampers
Wipe the base after tamping—coffee oils accumulate. Wooden handles (if you upgraded) should stay dry.
For overall maintenance schedules, check my Breville maintenance schedule.
Where to Buy
Amazon
Good for: Generic accessories (dosing funnels, basic tampers, portafilters) Avoid: Precision baskets (sometimes counterfeits)
Specialty Retailers
Seattle Coffee Gear and Clive Coffee stock genuine IMS/VST baskets, quality tampers, and Breville-specific accessories. Worth the slightly higher prices for authenticity.
Direct from Brands
- Normcore – Sells direct with good prices
- Acaia – Scales direct from manufacturer
- Decent Espresso – High-end accessories
Used/Secondhand
Check r/coffeeswap or eBay for gently used precision baskets and tampers. I’ve found great deals on lightly used accessories.
Conclusion
Not every upgrade is worth the money, but the right ones transform your Breville experience. Focus on fundamentals first: precision basket, good scale, and a tamper that fits properly.
Top 3 value upgrades:
- Precision basket ($25) – Immediate consistency improvement
- Scale ($45-50) – Essential for dialing in
- Precision tamper ($30-45) – Consistent, level tamps
Skip the Instagram aesthetics and focus on function. Your shots will thank you.
Already have upgrades that made a difference? Share them in the comments—I’m always curious what works for other home baristas.
For more on accessories, see my Breville Barista Express accessories breakdown.
Mikael
Home espresso enthusiast and Breville specialist. Helping you master the art of coffee brewing from your own kitchen.
Learn more about me →