Breville Grinder Retention: How to Reduce Waste
Learn how to minimize coffee grinder retention on Breville machines. Reduce waste, improve consistency, and keep your espresso tasting fresh with practical purging and cleaning techniques.
I wasted a lot of coffee before I understood retention.
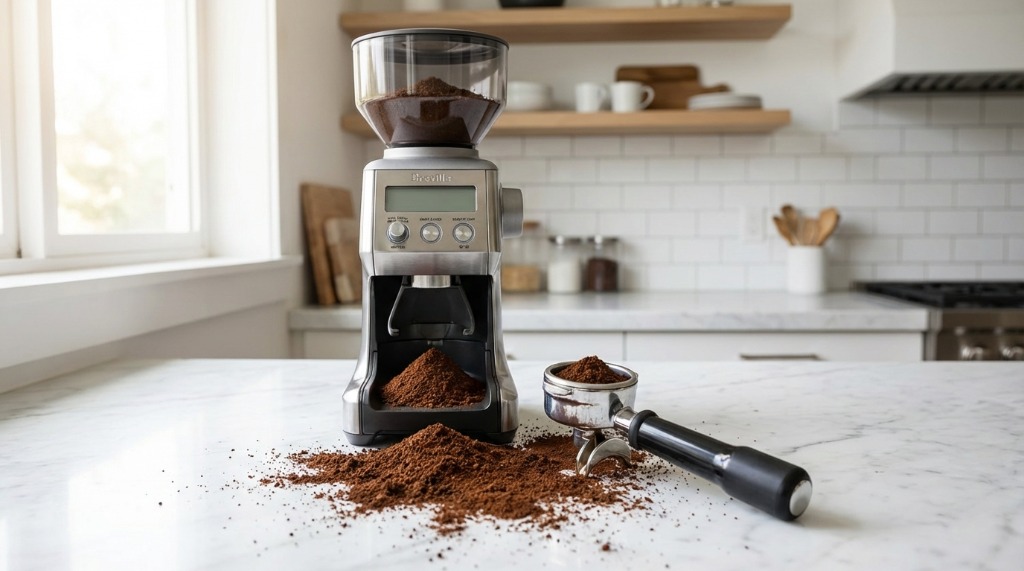
Every morning, I’d grind 18 grams of beans and assume 18 grams landed in my portafilter. Spoiler: they didn’t. Some stayed behind in the grinder—stale by the next day, mixed into my fresh dose, throwing off my shots and my sanity.
If your espresso tastes inconsistent, or you’re burning through beans during dial-in, grinder retention might be the invisible culprit. Let’s fix that.
How to Reduce Grinder Retention
The Goal: Less Waste, More Consistent Dosing
Retention is the coffee that stays inside your grinder after you stop grinding. It mixes with tomorrow’s fresh beans, affects your dose weight, and—if you’re switching coffees—contaminates your flavour.
The goal isn’t zero retention (that’s nearly impossible with home grinders). It’s manageable retention: knowing how much stays behind and building habits to minimize its impact.
Root Causes You Can Control
Three things drive retention you can actually influence:
- Static electricity – Dry environments and certain beans create static, making grounds cling to surfaces
- Fines buildup – Fine particles accumulate in crevices over time
- Workflow timing – Grinding immediately before brewing vs. letting grounds sit
You can’t eliminate static completely, but you can reduce it (more on that below).
Quick Wins vs. Deeper Fixes
| Quick Wins | Deeper Fixes |
|---|---|
| Purge 2-3g before first shot | Weekly burr brush-out |
| Tap the chute after grinding | Monthly deep clean |
| Single-dose instead of hopper grinding | Bellows or RDT (Ross Droplet Technique) |
Start with quick wins. Move to deeper fixes if retention still bothers you.
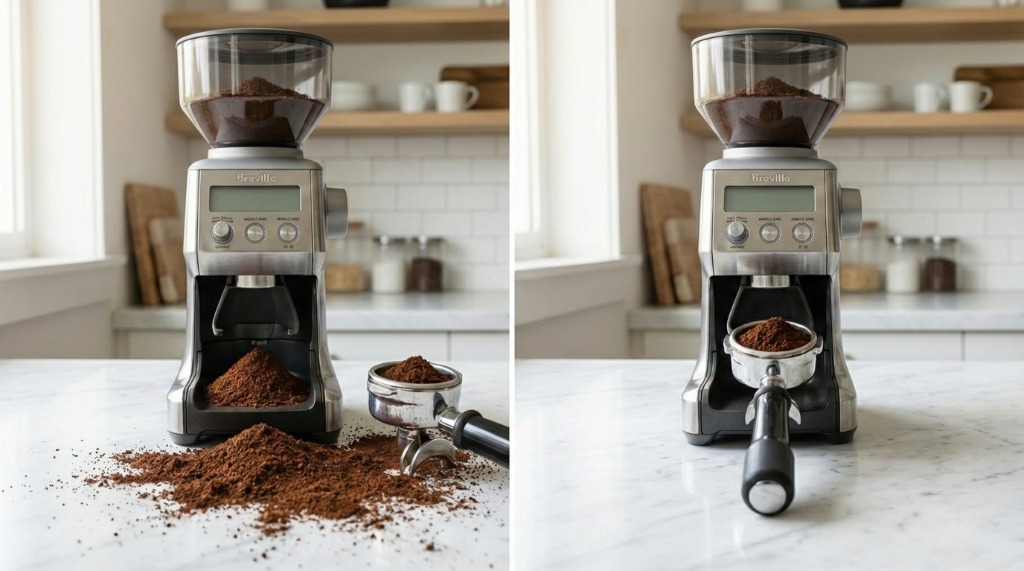 A comparison of a messy setup with high retention (left) versus a clean, controlled dosing workflow (right). Small habits make a big difference in maintaining a clean workspace and consistent dose.
Breville Smart Grinder Pro Retention
The Smart Grinder Pro is Breville’s standalone grinder, and while it’s excellent for the price, retention is real.
Where Retention Happens
- Burr chamber – Grounds stick around the burrs themselves
- Chute/exit path – The vertical channel where grounds fall
- Declumper area – The wire grid that breaks up clumps traps fines
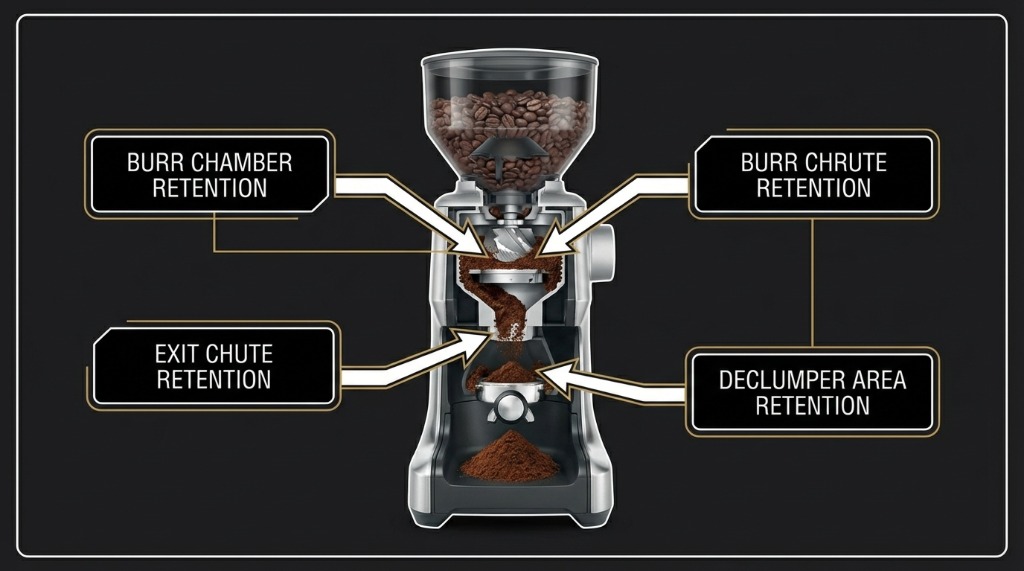 Retention typically occurs in three main areas: the burr chamber, the exit chute, and around the declumper wire.
I measured 1.5-2g retention on my Smart Grinder Pro. That’s meaningful when you’re dosing 18g.
Common Symptoms
- Dose mismatch – You grind 18g of beans but only get 16g out
- Clumps in portafilter – Retained grounds compact and release in chunks
- Stale carryover – Yesterday’s grounds mix with today’s fresh ones
When Retention Suggests Maintenance
If you notice:
- Oily residue coating the chute
- Blocked or partially clogged exit path
- Inconsistent output despite consistent input
…it’s time for a deep clean, not just a purge.
Barista Express Grinder Retention
The built-in grinder on the Barista Express is convenient but constrained. You can’t modify it much, but you can work smarter.
Built-In Grinder Constraints
The integrated grinder has higher retention than standalone options—typically 2-3g. The chute is short but angled, and the declumper traps fines.
What you can improve without mods:
- Timing-based dosing → weight-based dosing
- Random grinding → consistent purge routine
- Monthly cleaning → weekly burr brush-out
”Weigh In / Weigh Out” Dosing
Stop trusting the timer. Start weighing.
- Weigh your beans before grinding (18.0g)
- Grind directly into portafilter on a scale
- Note actual output (maybe 16.2g first shot of day)
- Adjust next grind to compensate
This sounds tedious, but it becomes automatic. And your shots become consistent.
Minimizing Waste During Dial-In
When you change grind size, the first 2-3 doses contain old grind settings mixed with new. This is why “first shot after adjustment” often tastes wrong.
Solution: After adjusting grind, purge 3-4g into a waste container before your actual dose. Yes, it’s waste—but it’s less waste than pulling 3 bad shots.
Barista Pro Grinder Retention
The Barista Pro has a faster grinder with tighter tolerances, but retention is still 1.5-2g.
Managing Retention While Adjusting Grind
The Barista Pro allows finer adjustments (0.1 increments), which is great—but retention makes small changes hard to evaluate.
Don’t chase your tail: If you adjust from 15 to 14, wait for the second shot at that setting before judging. The first shot contains mixed grind sizes.
Retention-Reduction Routine for Back-to-Back Drinks
Making multiple drinks? Here’s my routine:
- Grind first dose, tap grinder twice, brew
- Before second drink, run grinder for 1 second to clear stuck fines
- Grind second dose normally
This keeps retention from accumulating between drinks.
Switching Coffees (Keep Flavours Clean)
Switching from Ethiopian light roast to Brazilian dark? That flavour contamination is brutal.
My switching routine:
- Empty hopper of old beans
- Run 10-15g of new beans through (into waste)
- Wipe visible surfaces
- Proceed with new coffee
Yes, you sacrifice some beans. But your first cup of new coffee actually tastes like new coffee.
Coffee Grinder Retention Meaning
Let’s get precise about terminology.
Retention vs. Exchange Dose
Retention = total coffee stuck in grinder at any moment Exchange = how much old coffee exits with each new grind
Even if retention is high (say, 3g), exchange might be low if those grounds are truly stuck. But if exchange is high, you’re always drinking yesterday’s coffee.
Why “In = Out” Doesn’t Guarantee Freshness
If you grind 18g and 18g comes out, you might think “great, no retention!” But actually, 2g of old grounds came out while 2g of new grounds stayed behind.
The quantity matches, but freshness doesn’t.
A Simple Test
- Weigh out exactly 20g of beans
- Grind completely until hopper is empty
- Weigh what came out (say, 18.1g)
- Run grinder empty until nothing more exits (maybe 1.5g more)
- Remaining difference = truly stuck retention
This tells you exactly what you’re dealing with.
Single Dosing Breville Grinder
Single dosing means grinding only the beans you need for each shot—no beans sitting in the hopper.
Single-Dose Workflow on a Hopper Grinder
The Breville grinders have hoppers, not single-dose designs. But you can adapt:
- Keep hopper mostly empty (or use a small container as a collar)
- Weigh out beans for each dose (18g)
- Drop into hopper
- Grind until empty
- Tap/purge to clear remaining grounds
Managing “Popcorning”
When few beans remain, they bounce around instead of feeding into burrs (“popcorning”). This creates inconsistent grind.
Solutions:
- Use a narrow funnel or silicone hopper collar
- Light finger pressure on beans during final grinding
- Accept first 1g may be rougher than the rest
Storage Habits for Single Dosing
Single dosing only works if your beans are fresh:
- Store beans in airtight container, cool and dark
- Pre-weigh doses into small containers if you want speed
- Don’t pre-grind—grind immediately before brewing
How to Purge Coffee Grinder
Purging clears old grounds from the grind path. It’s your daily retention reset.
When to Purge
- First drink of the day – Clear overnight stale grounds
- After grind changes – Clear mixed-size particles
- After long idle time – If grinder sat 4+ hours
How Much to Purge
Most Breville grinders need 2-4g purge to clear the path. More than that, you’re wasting coffee. Less than that, stale grounds contaminate your dose.
My default: 3g purge every morning, into a waste container.
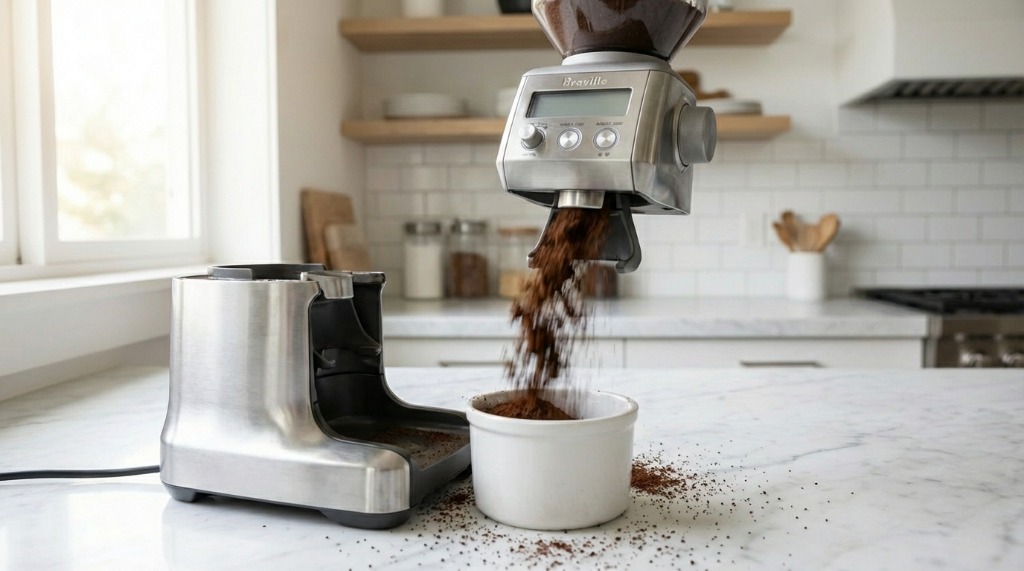 Purging a small amount of coffee (usually 2-4g) removes stale grounds from the previous day, ensuring your shot is pulled with 100% fresh grounds.
Purge Technique
- Place waste container under grinder
- Run grinder for 2-3 seconds
- Tap the chute or grinder body to dislodge clinging grounds
- Wipe any grounds from the chute exit
- Proceed with normal dosing
Grinder Chute Cleaning
The chute is where grounds travel from burrs to your portafilter. It gets dirty.
Cleaning Frequency Tiers
| Frequency | Action |
|---|---|
| Daily | Wipe chute exit with dry cloth |
| Weekly | Brush out visible fines |
| Monthly | Full chute disassembly and cleaning |
Step-by-Step Chute Cleaning
Weekly (5 minutes):
- Unplug grinder
- Remove portafilter/dosing cup
- Use small brush to sweep chute interior
- Wipe exit with dry microfibre cloth
- Run empty to clear loosened particles
Monthly (15 minutes):
- Unplug grinder
- Remove upper burr if accessible (consult manual)
- Brush burr chamber thoroughly
- Vacuum loose particles (carefully!)
- Reassemble and run 5g through to reset
Safety Notes
- Always unplug before any internal cleaning
- Keep water away from burrs – they’ll rust
- Don’t reach into burr area – even unplugged, edges are sharp
Bellows Mod for Coffee Grinder
Bellows push retained grounds out by forcing air through the chute. They’re popular in the single-dosing community.
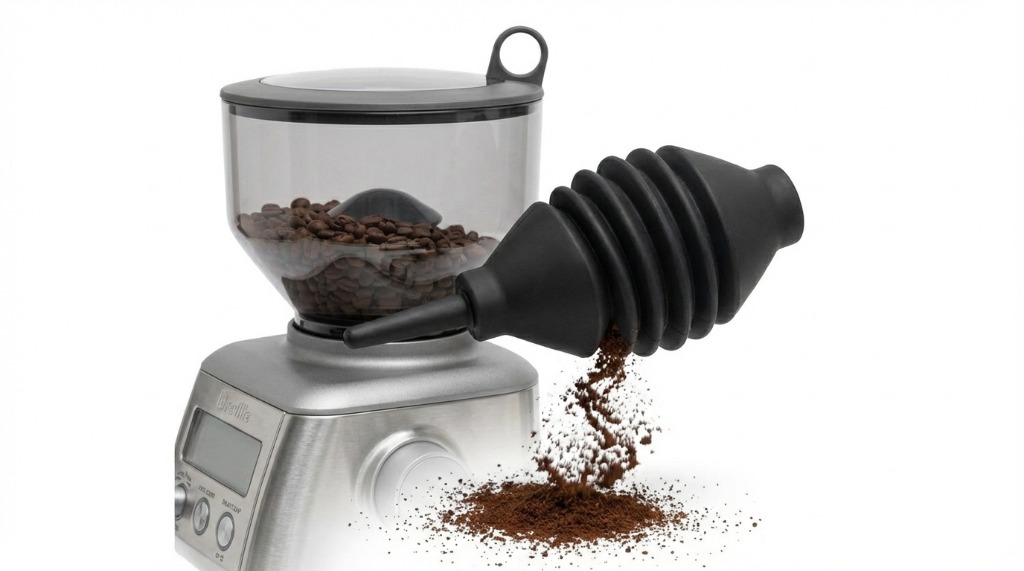 A bellows creates a burst of air that dislodges coffee grounds trapped in the internal chutes and burr chambers.
Why Bellows Help
A bellows (silicon ball or bulb) creates positive pressure that pushes grounds through the grind path. This can reduce retention from 2-3g down to under 1g.
But they don’t help if:
- Your grinder has an airtight channel (air doesn’t push through)
- Grounds are stuck in crevices the air can’t reach
- You’re blowing grounds backwards into the motor area
Safe Use
Only use bellows if:
- Your grinder model has an open air path
- You’re pushing gently, not forcing
- You check occasionally that grounds aren’t accumulating inside the body
Alternatives to Bellows
Not everyone wants to buy accessories:
- Tapping routine – Firmly tap grinder body after each grind
- Brush-out – Daily brush of chute
- Micro-purge – 1-2g at end of each grind to push through lingering grounds
I use the tapping routine daily and save bellows for when I switch coffees.
Reduce Stale Grounds in Espresso
Retention isn’t just about waste—it affects taste.
How Retention Changes Flavour
Stale grounds (from yesterday or earlier) have:
- Oxidized oils = rancid, flat flavours
- Different particle profile = inconsistent extraction
- Lower aromatics = less lively cup
Even 1g of stale grounds in an 18g dose is 5.5% contamination.
Practical Dial-In Method
When dialing in a new coffee:
- Purge 5g after first grind adjustment
- Pull shot, evaluate
- If adjusting again, purge 3g before next shot
- Don’t judge taste until second shot at each setting
This accounts for retention mixing up your results.
Core Barista Skills That Cut Waste
Beyond grinder hacks, these skills minimize waste across your workflow:
Dose Control
- Weigh beans in, grounds out
- Time your grinder to understand its output
- Develop a consistency mindset (same every time)
Sensory Calibration
- Taste your shots deliberately
- Learn to recognize stale notes (flat, papery, lacking brightness)
- Notice aroma changes as beans age
Record-Keeping
Keep a simple log:
- Date, coffee name
- Grind setting, dose in, dose out
- Yield, time, tasting notes
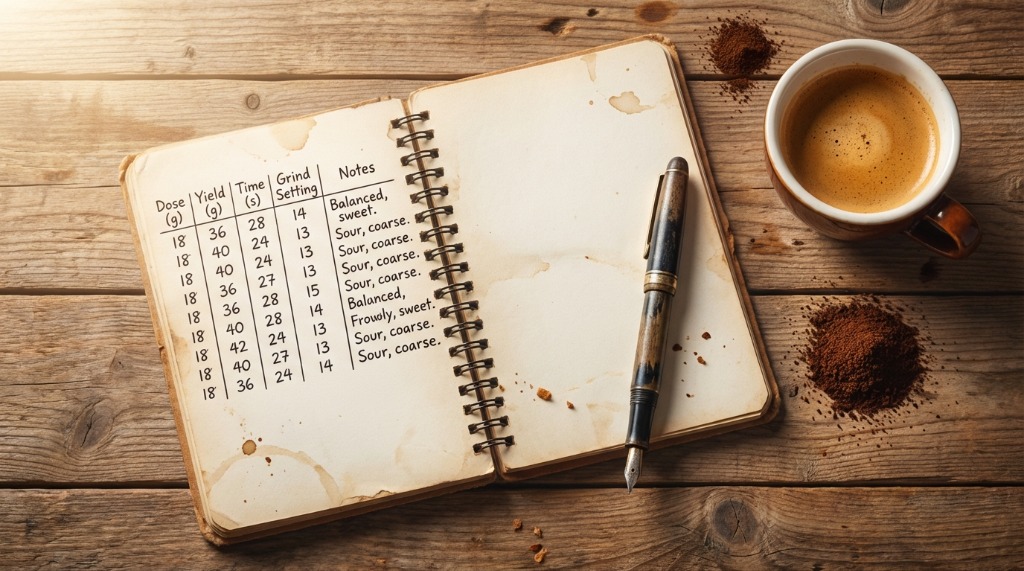 Keeping a detailed dial-in log helps you track how grinder adjustments and retention affect your shots over time.
This reveals patterns you’d never notice otherwise.
Essential Tools for Retention Management
Must-Have
- 0.1g scale – For weighing beans and output
- Timer – Built into most Brevilles, but standalone helps
- Small brush – For daily chute maintenance
- Dry cloth – For wiping surfaces
Nice-to-Have
- Bellows or dose purger – For aggressive retention reduction
- Vacuum with narrow nozzle – For monthly deep cleans
- Grinder cleaning pellets – Optional, monthly
Safety Kit
- Screwdriver – For burr access if your model allows
- Dry-only cleaning supplies – Never wet!
Daily Workflow (Fast, Low Waste)
Here’s my every-morning routine:
- Weigh beans (18g into hopper or dosing cup)
- Purge (3g into waste container)
- Grind (into portafilter on scale)
- Clear chute (two firm taps)
- Brew (proceed as normal)
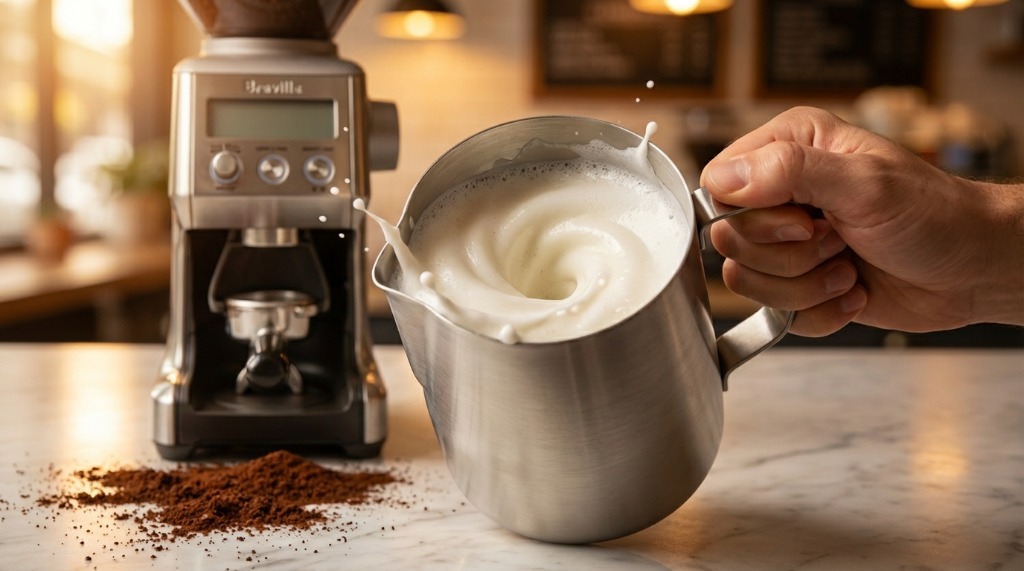 Maintaining a consistent grinder routine ensures that every shot—and every milk beverage—is pulled with fresh, high-quality grounds.
- Wipe (chute exit and workspace)
Total extra time: 30 seconds. Total waste: 3g/day = about 1 extra bag per year.
Dial-In Workflow
When changing grind size:
- Make adjustment on dial
- Purge 4-5g (this is mixed old/new)
- Grind actual dose
- Pull shot and evaluate
- If adjusting again, purge 3g before next shot
Never judge the first shot after adjustment. Retention makes it unrepresentative.
Switching Coffees Workflow
When changing bean origins or roasters:
- Empty hopper of old beans
- Brush chute quickly
- Run 10-15g of new beans through (sacrifice dose)
- Wipe surfaces
- Proceed with normal workflow
The sacrifice dose hurts, but mixed-coffee shots taste worse.
Conclusion
Retention is invisible but not uncontrollable. With a few habit changes:
- Purge before your first shot and after grind adjustments
- Weigh beans in and grounds out
- Clean the chute weekly, deep clean monthly
- Tap or bellow after each grind to clear lingering grounds
Your espresso will taste more consistent, your wastage will drop, and your dial-in sessions will actually make sense.
The grinder’s job is to turn beans into grounds. Your job is to make sure those grounds are fresh ones.
Mikael
Home espresso enthusiast and Breville specialist. Helping you master the art of coffee brewing from your own kitchen.
Learn more about me →