Best Breville Grinder Settings
Complete grind settings chart for Breville Barista Express, Pro, and Smart Grinder. Dial in perfect espresso with these tested configurations.
Remember that first espresso machine unboxing? A Breville Barista Express, shiny and full of promise. I loaded it with beans, hit the grind button, and… nothing but a sad dribble of water racing through the puck in under 20 seconds. Bitter? No, more like watery disappointment.
I fiddled with the grind knob for hours, going finer and finer until it clogged everything up. Shots took forever, tasting like ash. Sound familiar?
That grind frustration is real, but after months of tweaking—and way too many ruined shots—I’ve nailed down Breville grinder settings that actually work. Let’s talk about getting your Breville grinder settings right, from the basics to charts you can use today.
Understanding the Grind Scale
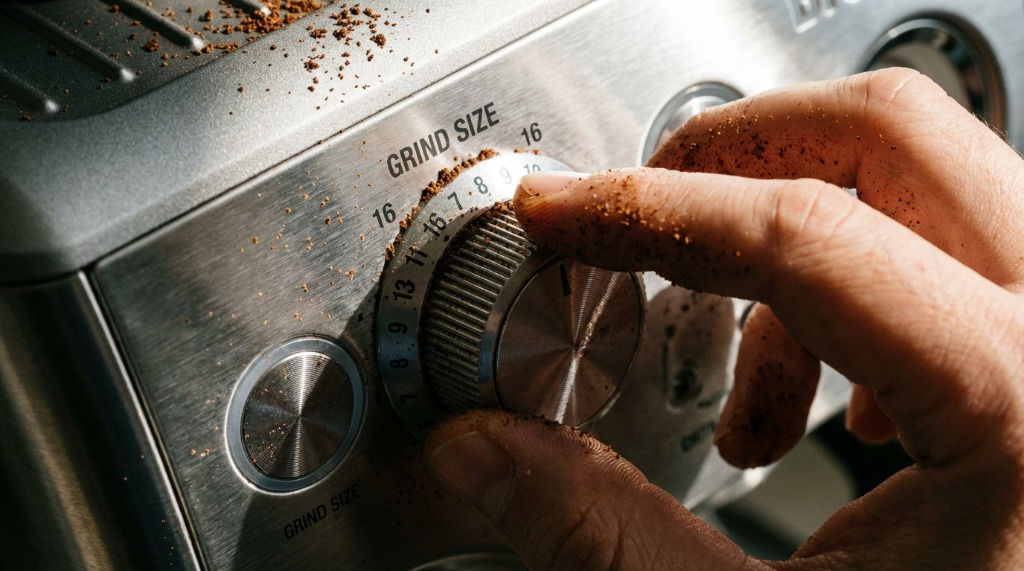
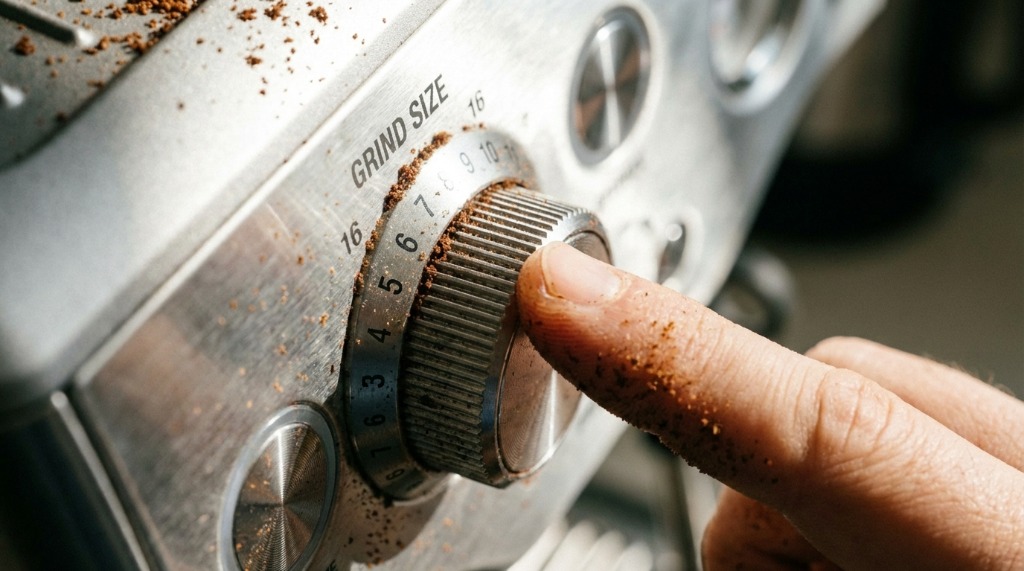
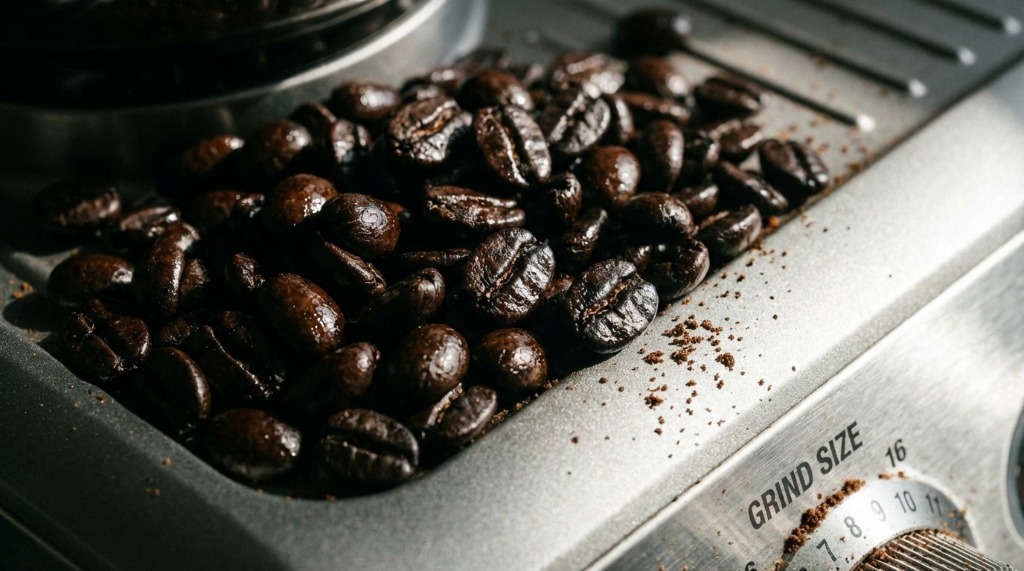
Breville grinders aren’t like basic blade ones. They use conical burrs that crush beans consistently, which is key for espresso grind distribution. But the scale? It’s numbered, usually from 1 (finest) to 16 or more (coarsest), depending on the model.
Why does this matter? A good grind lets water flow just right—25-30 seconds for a double shot. Too coarse, and water rushes through, giving you sour, weak espresso. Too fine, and it chokes, leaving you with bitter, over-extracted muck.
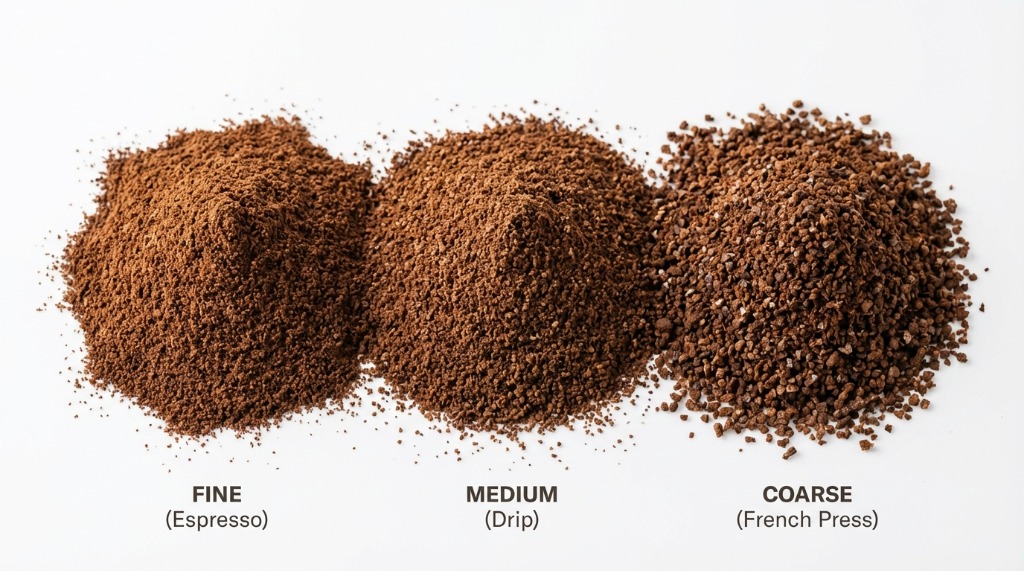 Comparing fine (espresso), medium (drip), and coarse (french press) grind textures side-by-side.
The Number System Explained
Take the Barista Express grind size dial. It’s right there on the side, clicking from 1 to 16. Start around 5-7 for espresso if you’re new. But here’s the thing: every bag of beans acts different. Light roasts need finer tweaks because they’re denser. I once had Ethiopian beans that laughed at setting 6—had to drop to 3 for a proper pull.
 The Barista Express grind dial ranges from 1 to 16, but fresh beans often require sub-setting adjustments.
What if you’re maxed out? Say you’re at 1 and shots still pour too fast. That’s when you adjust deeper.
Inner Burr Adjustments
Ever feel like your grinder’s finest isn’t fine enough? Time for Breville grind adjustment on the inner burrs. On the Barista Express, pop off the hopper, remove the upper burr (there’s a handle), and you’ll see numbers 1-9 inside.
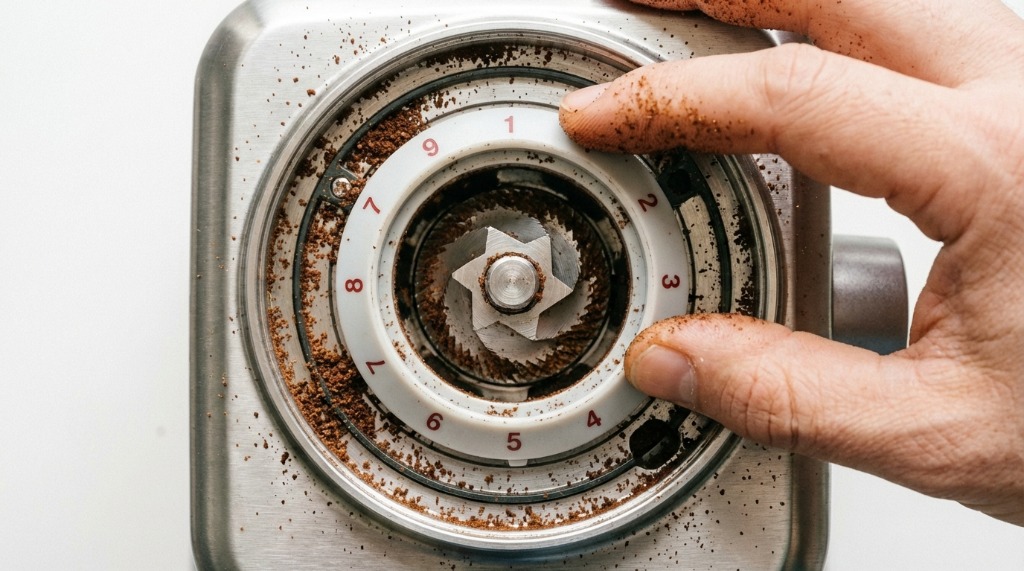 Adjusting the inner burr allows you to shift the entire grind range finer or coarser than the outer dial allows.
Factory default is usually 6. Moving to a lower number (like 3-4) shifts your entire grind range finer. This saved me when I hit a particularly stubborn light roast from Kenya—outer dial maxed at 1, still too fast. Inner burr to 4, outer dial back to 5, and finally perfect shots.
Warning: Run some beans through after adjusting inner burrs. The first dose will be inconsistent.
Settings by Bean Type
Here’s where testing pays off. I’ve kept a log for over two years, and patterns emerge.
Light Roasts (Finer Settings)
Light roasts are denser—they resist water flow more than darker beans. You need fine grind espresso settings, often 2-4 on the outer dial.
 Light roast beans (like this Ethiopian Natural) are hard and dense, requiring a much finer grind to extract properly.
My go-to for Ethiopian naturals: outer dial 3, inner burr 5. This gives me 27-second extractions with beautiful fruit notes. If your shots run under 25 seconds, go finer. Still sour? Check my sour vs bitter espresso guide for diagnosis.
Medium Roasts
The sweet spot for most home baristas. Medium roasts are forgiving—start at 5-6 on the outer dial with factory inner burr settings.
I use a Colombian medium for daily drinking. Settings: outer 5, inner 6. Shots pull in 28 seconds, nice caramel sweetness, zero bitterness. If you’re just starting, grab a medium roast and use these as your baseline.
Dark Roasts (Coarser Settings)
Dark roasts are the opposite problem—porous, oils visible, water flows through easily. Go coarser: 7-10 on the outer dial.
 Dark roast beans are shiny with oils and very porous, meaning they need a coarser grind to avoid over-extraction.
I learned this when I accidentally used dark roast Italian beans with my light roast settings. The machine practically choked—45-second extraction of pure bitter sadness. Backed off to 9, got a proper 30-second shot with chocolate notes.
Here’s my quick reference chart:
| Roast Level | Outer Dial Range | Inner Burr | Typical Extraction |
|---|---|---|---|
| Light | 2-4 | 4-5 | 28-32s |
| Medium | 5-7 | 5-6 (default) | 25-28s |
| Dark | 8-11 | 6-7 | 25-30s |
Model-Specific Charts
Not all Breville grinders are equal. Here’s what works on each.
Barista Express Settings
The Express has 16 outer settings plus inner burr adjustment. It’s a stepped grinder, meaning you’ll click between fixed positions.
Starting point for new users:
- Outer dial: 5
- Inner burr: 6 (factory)
- Dose: 18g
- Target time: 25-30 seconds
My personal settings after 2 years:
- Medium roast: Outer 5, Inner 6
- Light roast: Outer 3, Inner 5
- Dark roast: Outer 9, Inner 6
The Express grinder is capable but can feel limiting between settings. If setting 4 chokes and setting 5 runs too fast, adjust dose slightly (17.5g vs 18g) to compensate. See my grind-size-adjustment-guide for more on dialing.
Barista Pro Settings
The Pro upgrades to 30 digital settings—much finer control. No inner burr adjustment needed for most situations.
Starting point:
- Grind setting: 15
- Dose: 18g
- Target time: 25-30 seconds
My tested settings:
- Medium roast: 14-16
- Light roast: 10-13
- Dark roast: 18-22
The digital display makes adjustments precise. I find one setting change on the Pro equals about half a second in extraction time—much more predictable than the Express.
Smart Grinder Pro (Standalone)
If you’re using Breville’s standalone grinder with a Bambino or Dual Boiler, here’s your chart:
| Roast | Setting Range | Grind Time (18g) |
|---|---|---|
| Light | 8-12 | 22-25s |
| Medium | 12-16 | 20-22s |
| Dark | 16-22 | 18-20s |
The Smart Grinder has 60 settings, so you have tons of room to dial. Always purge a second of grounds after changing settings—the chute retains old grinds.
Dialing In Process
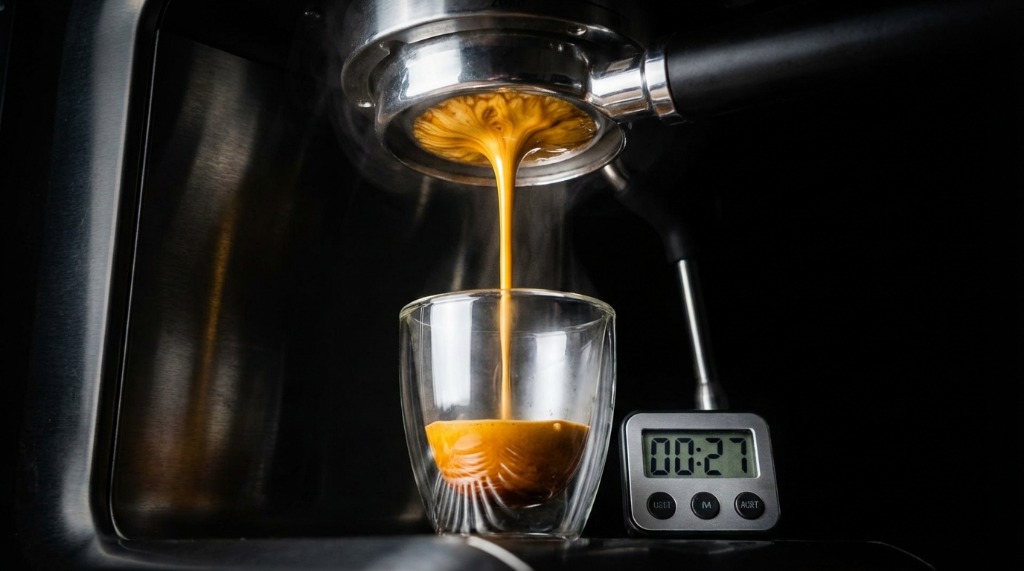 Timing your extraction is the most reliable way to tell if your grind size is correct.
Ready to dial? Here’s my step-by-step ritual:
Step 1: Fresh beans, 7-14 days off roast. This matters—stale beans behave unpredictably.
Step 2: Dose 18g into the portafilter. Use a scale. Seriously.
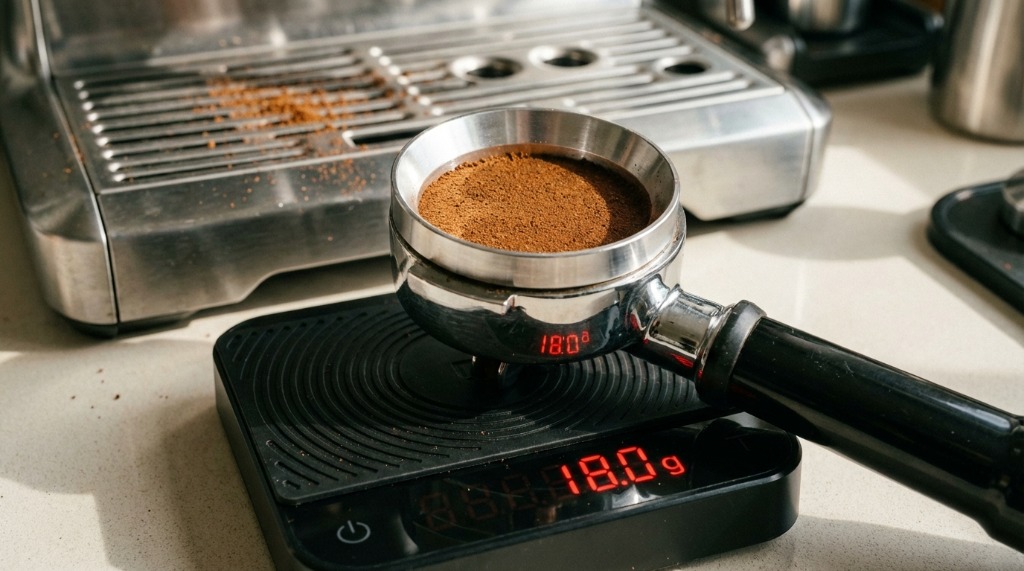 Precision is key. A small variation in dose can drastically change how your grind size performs.
Step 3: Pull the shot. Time it from the moment you press the brew button.
Results:
- Under 25 seconds? Go finer (lower number)
- Over 35 seconds? Go coarser (higher number)
- Blonding too fast? Definitely need finer grind
Step 4: Weigh your output. Target 36-40g out in about 28 seconds for a standard double.
I do this ritual every new bag. It takes maybe 3-4 shots to nail it. The key is changing only ONE variable at a time. Adjust grind, then pull another shot. Don’t touch dose or yield until grind is close.
For detailed weight ratios, see my weighing espresso output guide.
Common Grind Mistakes
I’ve made every mistake possible. Learn from my suffering:
Ignoring Inner Burr Adjustment
Maxed at outer setting 1 and shots still run too fast? Your inner burr is set too coarse. Drop it from 6 to 4, then reset your outer dial to 5-6. This extended my grind range significantly and solved my light roast frustrations.
Making Big Jumps
One notch maximum per shot. Going from 6 to 3 because “it’s still too fast” will overshoot every time. Patience.
Static Issues
Beans flying everywhere? Espresso grind distribution suffers when grounds clump from static. A few drops of water on beans before grinding (RDT method) helps. Or store beans in the freezer—cold beans have less static.
Never Cleaning the Grinder
Oils build up on burrs, clogging passages and producing stale flavors. Every couple weeks, pop the upper burr out and brush it clean. For a full walkthrough, check my breville-grinder-cleaning guide.
Overfilling the Hopper
More beans = more weight pressing down = inconsistent grind. Keep the hopper at most 2/3 full. I made this mistake for months before realizing why my first shot of the day always differed from the rest.
Chasing “Perfect” Numbers Online
Your kitchen, your beans, your water—they’re all different from mine. Use charts as starting points, not gospel. Taste rules everything. If your shots taste good at setting 8 when everyone online says 5, you’re right and they’re wrong.
One time, I ground too fine on a dark roast—machine labored like it was dying. Backed off to setting 11, saved the day. Trust your ears (grinder struggling = too fine) and your taste buds.
Conclusion
Getting your Breville grinder settings dialed takes patience, but it’s worth every wasted shot along the way. Remember:
- Start in the middle (5-7 for Express, 14-16 for Pro)
- Adjust one notch at a time based on extraction time
- Use inner burr adjustment only when outer dial is maxed out
- Log your settings for each bean—you’ll thank yourself later
What’s your toughest bean story? The one that had you pulling your hair out trying to dial in? I’d love to hear it in the comments.
Happy grinding!
Mikael
Home espresso enthusiast and Breville specialist. Helping you master the art of coffee brewing from your own kitchen.
Learn more about me →