Fix Breville Low Pressure: Grind & Extraction Guide
Fix Breville pressure gauge too low with grind size, dose, and tamping adjustments. Complete troubleshooting guide for under-extracted espresso.
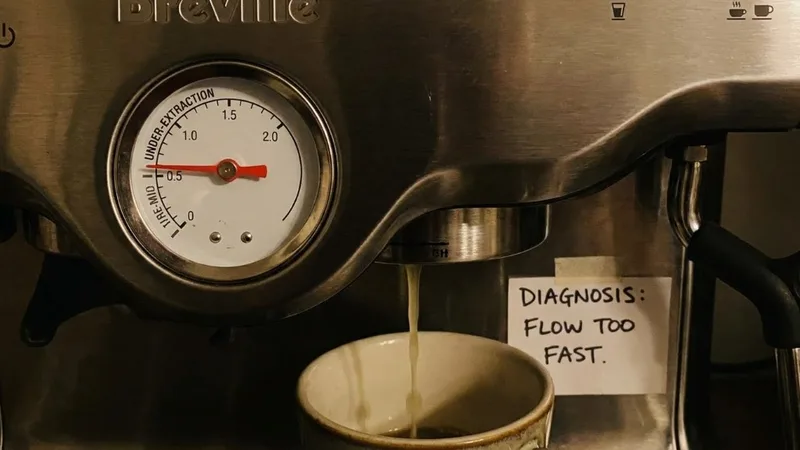
Woke up yesterday, ground my usual 18g, pulled the shot—and watched it absolutely gush through in about 12 seconds. Gauge barely moved from the left side. The result tasted like sour lemon water. Not exactly the morning pick-me-up I was hoping for.
If you’re seeing Breville pressure too low on your gauge, you’re dealing with under-extraction. The water’s blasting through your puck way too fast, leaving behind all the good stuff and only grabbing the harsh acids. Let me walk you through everything I’ve figured out fixing this on my own machine.
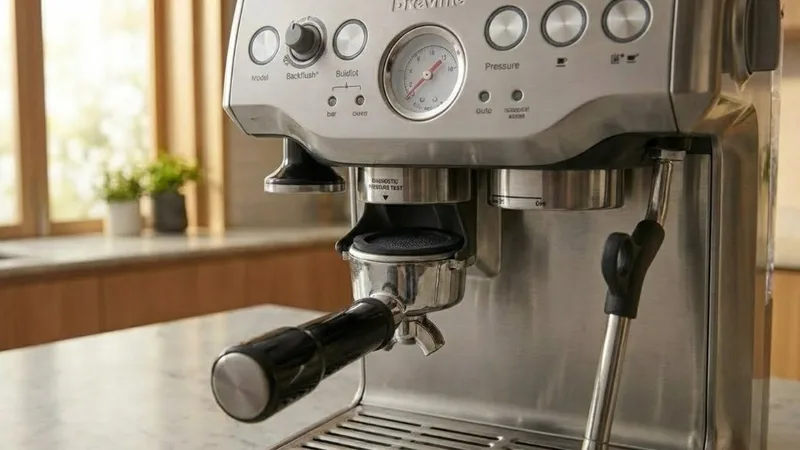
Understanding the Pressure Gauge
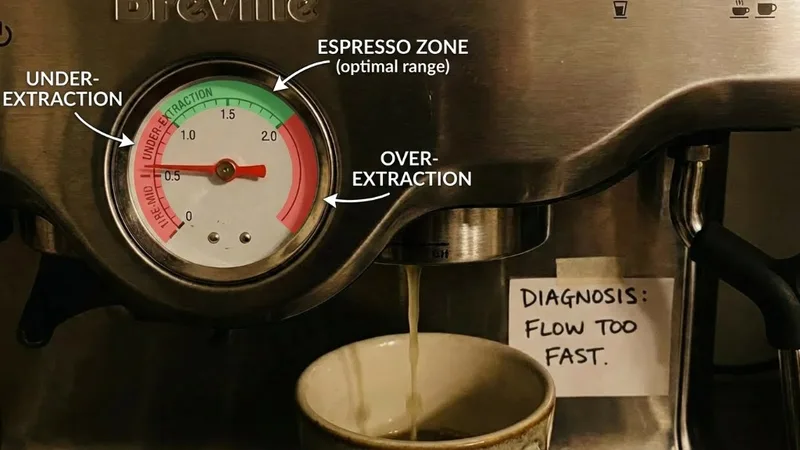
That pressure gauge on your Breville is actually telling you a lot about what’s happening inside. It’s marked with three zones:
- Pre-infusion zone (left/low): Totally normal for the first 5-8 seconds
- Espresso zone (middle/grey): This is your target during active extraction
- Over-extraction zone (right/high): Too much resistance—puck is fighting back
What the Numbers Mean
During a good shot, you should see:
- Needle starting low while the puck saturates
- Climbing up into that grey espresso band
- Settling around the 9-12 o’clock position
- Some movement is fine—it’s not going to stay perfectly still
Target pressure: 9-12 bar once pre-infusion finishes and real extraction starts
Why Pressure Matters
Here’s what the gauge is really showing you—how hard your puck is resisting the water:
- Low pressure = Water flying through without extracting properly
- Result = Sour, thin, watery disappointment
- High pressure = Water struggling to push through
- Result = Bitter, harsh, over-extracted shots
What you’re aiming for: 25-30 seconds total for a double shot (including that 5-8s pre-infusion phase), yielding around 36-40ml.
Quick note: these gauges aren’t laboratory-calibrated. I’ve pulled shots that tasted perfect even when the needle looked a bit high. Taste is the final judge, but the gauge gives you a solid starting point.
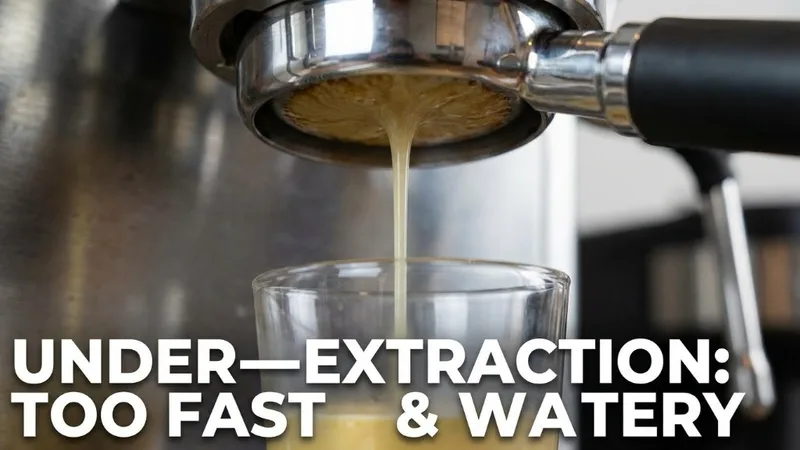
Signs of Under-Extraction
When your Breville pressure too low, the signs are pretty obvious once you know what to look for:
Visual Indicators
| Sign | What You See |
|---|---|
| Pour speed | Gushing out fast (under 15 seconds total) |
| Color | Blonde, watery, looks like weak tea |
| Crema | Thin, pale, fades within seconds |
| Puck after | Wet, soupy mess instead of a firm disk |
Taste Profile
Under-extracted espresso hits you with:
- Sharp sourness—like biting into an unripe citrus
- Thin mouthfeel—watery, no body
- Zero sweetness—none of those caramel or chocolate notes you’re chasing
- Astringent bite—dry, puckering sensation
- Short finish—flavor disappears immediately
Shot Characteristics
- Extraction finishes in under 20 seconds
- You’re getting way more than 36-40ml from 18g (ratio is off)
- Gauge needle hangs out in the left zone the whole time
Common Causes of Low Pressure
Let’s fix this. Here are the usual suspects:
1. Grind Size Too Coarse
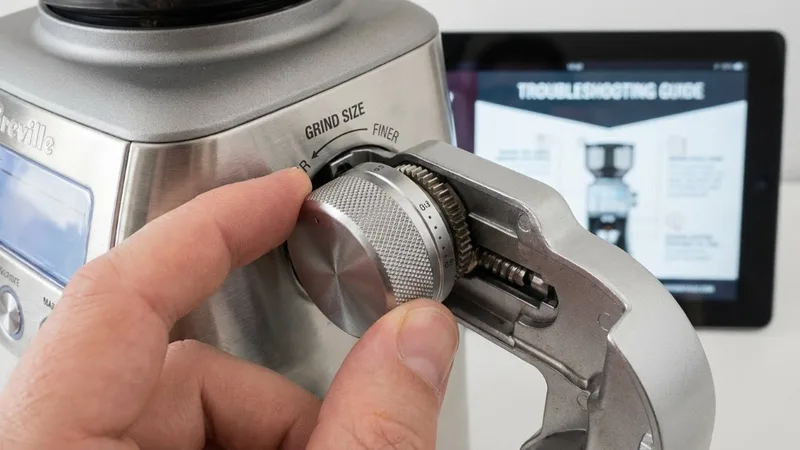
This is the problem 8 times out of 10. Coarse grounds don’t pack together tightly enough to resist water flow.
Fix: Go finer, one click at a time
| Breville Grind Dial | What You’ve Got |
|---|---|
| 1-3 | Very fine (probably too fine honestly) |
| 4-6 | Fine—start here for most beans |
| 7-9 | Medium-fine, often too coarse for espresso |
| 10-16 | Way too coarse for espresso |
For most medium roasts: Start at setting 5-6 and adjust from there.
Critical: Only move that dial while the grinder’s actually running. Adjusting when static can damage your burrs—learned this from the manual after almost making a mistake.
2. Dose Too Low
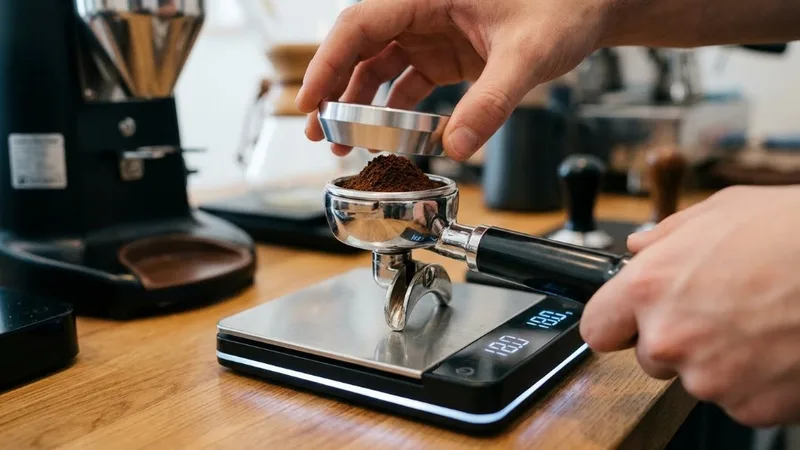
Not enough coffee = not enough resistance. Simple physics.
Fix: Bump up your dose
| Basket Type | Minimum | Sweet Spot |
|---|---|---|
| Single (7g) | 7g | 8-9g |
| Double (18g) | 16g | 18-20g |
Get a scale. Seriously. A $15 kitchen scale transforms your consistency overnight. Eyeballing doses is guessing, and guessing doesn’t work for espresso.
3. Weak or Uneven Tamp
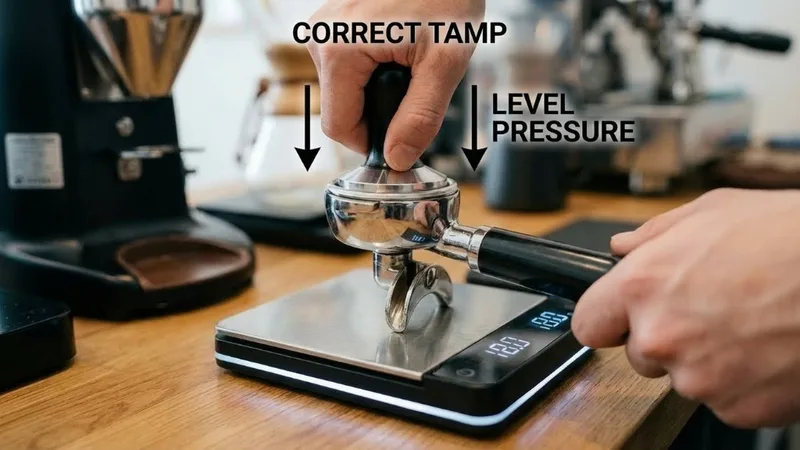
If you’re barely pressing or pressing crooked, water finds the easy path and rushes through.
What actually works:
- Aim for roughly 30 lbs of pressure (press your tamper on a bathroom scale to learn the feel)
- Keep the tamper level—no tilting
- Little twist at the end to polish the surface
- Don’t tap the portafilter afterward—creates gaps at the edges
4. Stale Coffee Beans
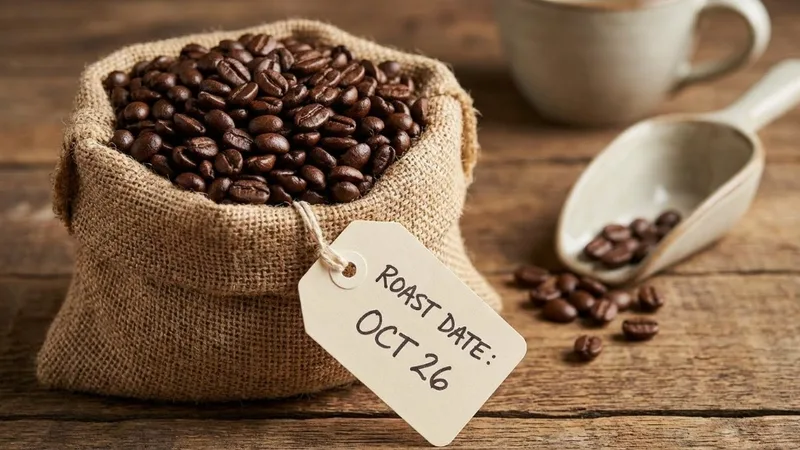
Fresh beans (2-14 days post-roast) still have CO2 trapped inside, which helps with extraction resistance. Stale beans have degassed and pack differently.
I bought beans from the grocery store once—roasted 3 months ago. Couldn’t get decent pressure no matter what I did. Switched to fresh local roasted beans and instantly everything worked.
What to do:
- Look for roast date (not “best by” date—that’s useless)
- Use within 4 weeks of roasting
- Airtight container, out of light
- Pre-ground coffee is essentially dead on arrival for espresso
5. Wrong Basket Type
Double-wall (pressurized) baskets artificially create pressure, hiding your actual issues. Single-wall baskets show you the truth—but require good technique.
Know your basket:
- Single-wall: Demands proper grind and technique, rewards you with better coffee
- Double-wall: Forgiving but limits how good your espresso can get
- If you’re using single-wall and getting low pressure, focus on grind and dose
Step-by-Step Troubleshooting
Work through this systematically instead of changing random things:
Step 1: Run a Blank Basket Test
This confirms your machine is actually working:
- Lock an empty portafilter (no basket) into the group head
- Put a cup underneath
- Press 2-cup button
- Watch that gauge
What should happen: Gauge maxes out to the far right—no resistance, full pressure.
If gauge doesn’t max: Your machine has a problem—pump issue, scale buildup, something mechanical. See the Machine Issues section.
Step 2: Check Your Grind Size
- Start at grind setting 5 or 6 for medium roast beans
- Pull a test: 18g in, aim for 36g out in 25-30 seconds
- Shot finished too fast (low pressure)? Go finer—lower number
- Move one click at a time
- Keep testing until you hit that target extraction time
Step 3: Verify Your Dose
- Weigh every dose—no estimating
- For double basket: 18-20g is your range
- Same dose every time—consistency matters
- Under-dosing = pocket of reduced resistance
Step 4: Evaluate Your Tamp
- Spread grounds evenly before pressing
- Firm, level pressure—around 30 lbs
- Surface should look flat and polished
- No tapping the portafilter sides afterward
Step 5: Check Bean Freshness
- Find the roast date on your bag
- Ideal window: 7-30 days from roast
- Super fresh beans (under 5 days) may actually need coarser grind
- Stale beans (over 30 days) struggle to build any pressure
Step 6: Run the Test Shot
After your adjustments:
- Dose 18g precisely
- Distribute evenly and tamp level
- Lock portafilter and brew immediately—don’t let it sit
- Time from button press to finish
- Target: 25-30 seconds for about 36g output
Machine-Related Issues
If you’ve dialed in your technique and pressure is still low, look at these:
Worn Group Head Gasket
Signs:
- Water leaking around the portafilter during extraction
- Hissing sound that wasn’t there before
- Pressure readings all over the place
- Portafilter feels looser than it used to
Fix: Replace the gasket ($10-15 part, takes 10 minutes)
- Pop off the shower screen
- Pry out the old gasket with a flathead
- Press the new one into the groove
- Reinstall shower screen
When to replace: Every 2-3 years with regular use. I’m on my second one now.
Pump Issues
Signs:
- Blank basket test fails—gauge doesn’t max out
- Weak or no water flow
- Pump sounds weird or strained
- Inconsistent pressure even when technique is solid
What to try:
- Descale first—scale can choke the pump
- Check if warranty still applies
- Call Breville support
- Professional repair might be needed
Scale Buildup
Signs:
- Performance slowly declining over months
- Flow rate getting slower
- Steam pressure dropping too
- Can’t remember your last descale
Fix: Descale the machine properly
- Check out our descaling guide
- Use Breville solution or citric acid
- Prevention: filtered water and regular descaling schedule
Prevention Tips
Keep your pressure consistently in the zone:
Daily Routine
- Warm up properly: 10-15 minutes, not 30 seconds
- Purge before pulling: Run water through the group head first
- Weigh every dose: Scale, every single time
- Keep notes: Track grind setting, dose, time, taste
Bean Management
- Buy from local roasters who put roast dates on bags
- Airtight containers, away from heat and light
- Use within 4 weeks—after that, quality drops fast
- Freeze extras in vacuum-sealed bags if you need to store longer
Machine Maintenance
- Weekly: Backflush with cleaning tablets
- Monthly: Descale—maybe more if you have hard water
- Monthly: Clean those grinder burrs
- Every few months: Check gaskets and seals for wear
Grind Best Practices
- Always adjust dial while grinding—never static
- Small moves only—1-2 clicks at a time
- Purge 2-3g after adjusting to clear old grounds
- Expect to recalibrate whenever you change beans
FAQs
My gauge stays low even at the finest grind—what now?
First thing: run the blank basket test. If the gauge maxes out, your machine is fine and it’s a technique issue—check dose, check bean freshness. If the gauge doesn’t max, something’s wrong with the pump or scale buildup. Might need service.
What’s the ideal dose for Breville Barista Express double basket?
18 grams is the standard starting point for the single-wall double basket. Some beans work better with 19-20g, others with 17-18g. Weigh, test, adjust.
What grind settings work for light roast coffee?
Light roasts are denser and harder for water to penetrate. Go finer than you’d expect—settings 3-5 often work. Consider slightly higher doses too. Light roasts also often extract a bit longer than dark roasts.
Is the pressure gauge accurate?
It’s a visual guide, not a precision lab instrument. Some machines read high, some read low. I’ve had shots taste great when the needle looked like it was in the over-extraction zone. Use it as a reference, but trust your taste and timing over the exact needle position.
Should I use double-wall or single-wall baskets?
Single-wall if you want the best espresso and you’re willing to dial in your technique. They give you more control and better flavor potential. Double-wall (pressurized) forgives bad technique but puts a ceiling on how good your shots can be.
Key Takeaways
- Low pressure = under-extraction—usually from coarse grind, low dose, or weak tamp
- Starting recipe: 18g dose, grind setting 5-6, firm level tamp, 25-30 second extraction
- Change one thing at a time—otherwise you won’t know what fixed it
- Fresh beans matter more than almost anything else
- Blank basket test tells you if the machine or your technique is the problem
- Stay on top of maintenance—descale regularly, replace gaskets every couple years
- The gauge points, but taste rules—adjust until it tastes balanced and sweet
Most of the time, fixing low pressure is as simple as grinding finer. Start there, work through the list, and you’ll be back to pulling good shots in no time.
Related Guides:
Mikael
Home espresso enthusiast and Breville specialist. Helping you master the art of coffee brewing from your own kitchen.
Learn more about me →