Breville Shots Too Fast? How to Slow Down & Dial In
Espresso gushing out in 10 seconds? Learn how to slow down your extraction using grind size, tamping, and dose adjustments for a sweeter, richer shot.
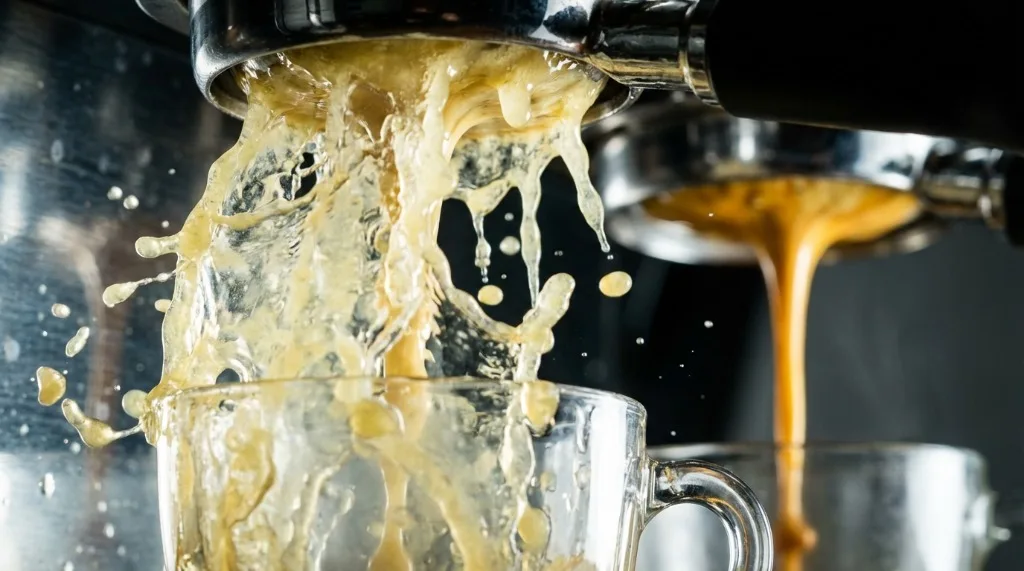
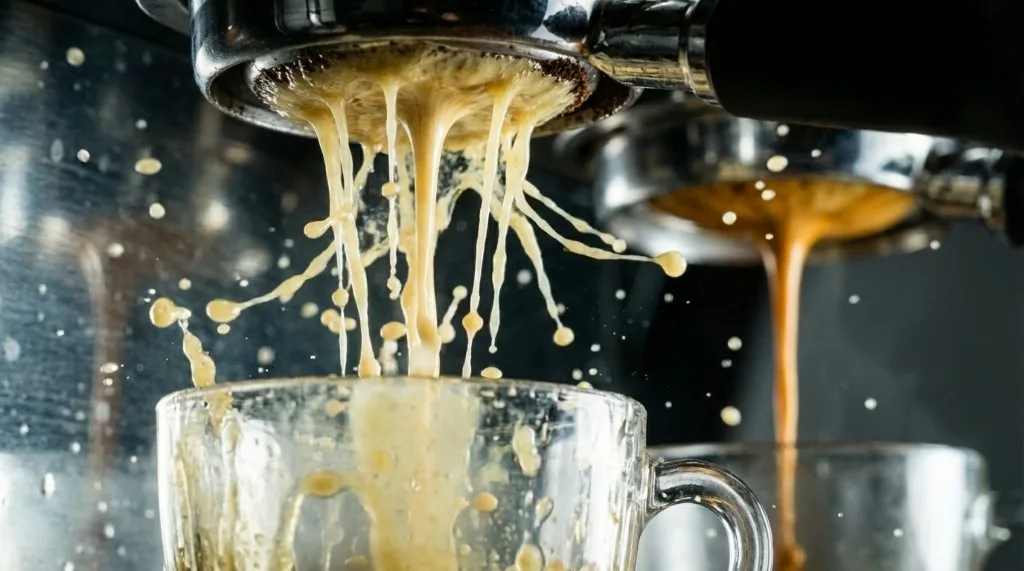
Press the button, and 10 seconds later your cup is overflowing with watery, pale liquid. Tastes sour, acidic, thin—nothing like the rich syrupy espresso you’ve seen. Just sad, weak coffee.
This is under-extraction. Water blasted through the coffee too fast to grab the good stuff—the sweet oils and sugars that make espresso actually delicious. It’s probably the #1 problem for new home baristas. Took me months to figure this out on my own Barista Express.
Good news: it’s almost always a settings problem, not broken equipment. Here’s how to slow it down and actually enjoy what you’re making.
Understanding Fast Shots
What “Too Fast” Actually Means
A standard double shot should take 25-35 seconds from button press to about 36-40g liquid in your cup. That’s for a typical 18g dose.
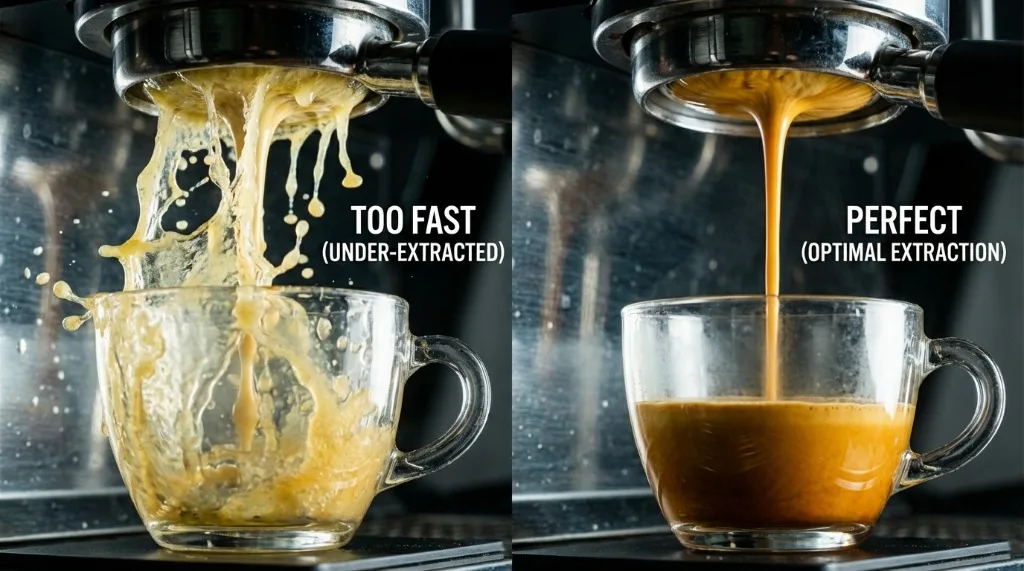
- Too Fast (<20 seconds): Water finds no resistance. Rushes through, barely extracts anything. Result: Sour, salty, thin, no crema.
- Target Range (25-35 seconds): Water works slowly through compressed coffee. Extracts oils, sugars, acids in balance. Result: Sweet, balanced, syrupy, that hazelnut-colored crema.
- Too Slow (>40 seconds): Water spends too long in the puck. Over-extracts bitter compounds. Result: Burnt, ashy, hollow.
The Extraction Science
Espresso extraction happens in stages:
- First 10 seconds: Acids and fruity compounds extract first. This is why under-extracted shots taste sour—you got the acid, none of the sweetness.
- 10-25 seconds: Sugars, oils, body develop. This is where the magic happens.
- 25+ seconds: Bitter compounds start dominating. Some bitterness balances, but too much ruins everything.
When your shot runs too fast, you’re getting mostly Stage 1 and missing Stage 2 entirely.
Primary Fix: Grind Size
Finer Grind = Slower Flow.
This is your main lever for controlling shot time. Think about it:
- Bucket of rocks: Water rushes through instantly.
- Bucket of sand: Water trickles through slowly.
Espresso grind sits between sand and flour. The finer you go, the more resistance.
How to Adjust
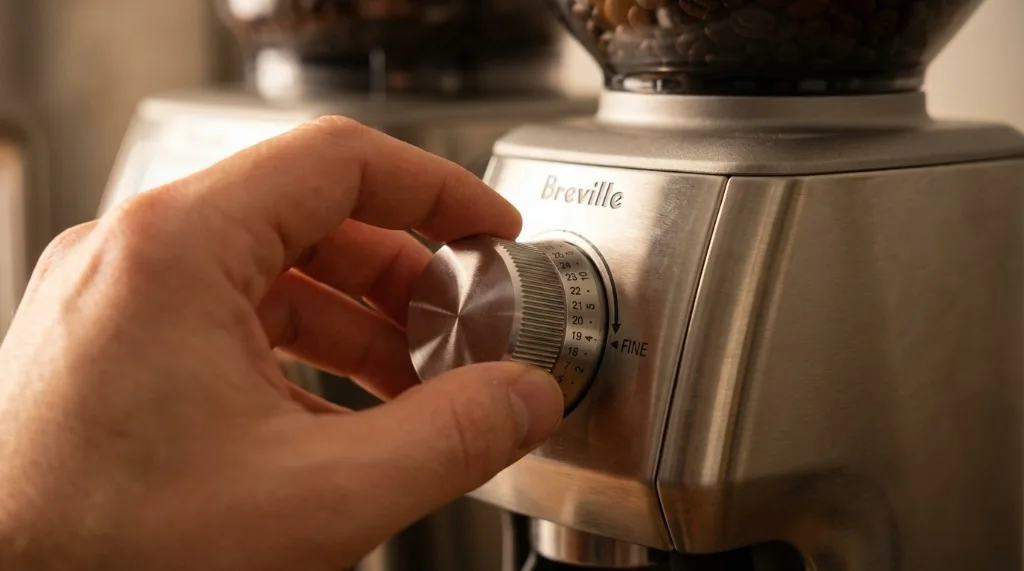
- Find current setting. On Barista Express, it’s the numbered dial (1-16).
- Move toward “Fine” (lower numbers). If shot took 12 seconds, move 2-3 full steps finer.
- Purge old grounds. After adjusting, run grinder briefly before collecting dose. The chute still has coffee from the old setting.
- Pull test shot and time again.
”I’m at Setting 1 and It’s Still Too Fast!”
Super common on Barista Express. The external dial (1-16) is just fine-tuning. There’s a second, internal adjustment that shifts the whole range.
How to adjust the internal burr:
- Remove hopper and top burr (lift wire handle, twist counter-clockwise).
- Remove metal carrying handle from burr itself (lifts off).
- You’ll see numbered ring on burr (usually 1-10, factory default is 6).
- Rotate plastic collar to lower number (e.g., from 6 to 4 or 3).
- Put everything back together.
This shifts entire grind range finer. Your external dial still works the same, but now “1” is actually finer.
I run my internal burr at 4, external dial around 5. Gives me plenty of room for different beans.
Secondary Factors
If grind alone doesn’t fix it, check these:
1. Dose Amount
Are you using enough coffee?
The rule: Less coffee = less resistance = faster flow.
If you’re dosing 15g into an 18g basket, there’s empty space. Water takes the easy path—right through that gap.
What to do:
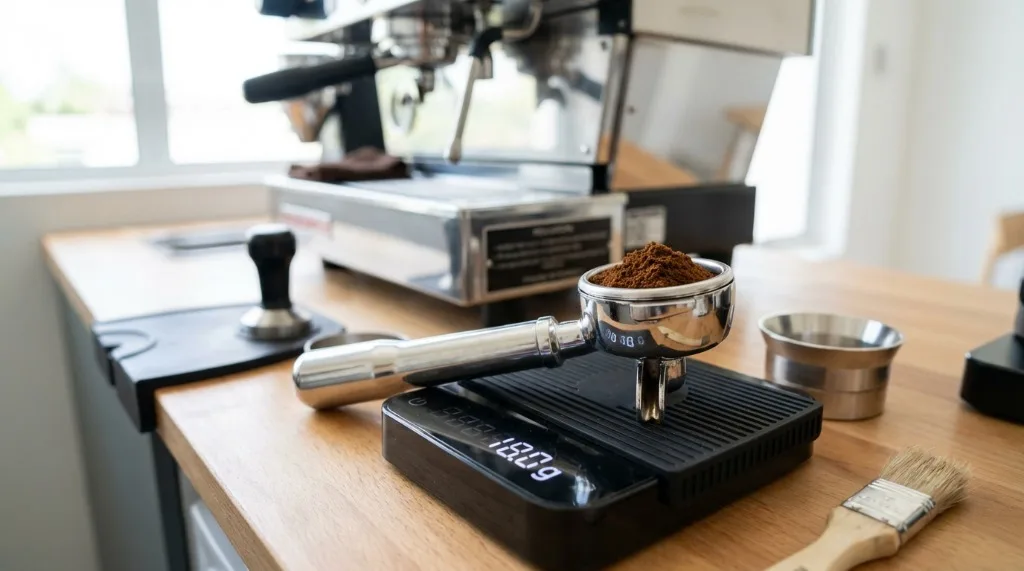
- Use a scale. Guessing by volume is wildly inconsistent.
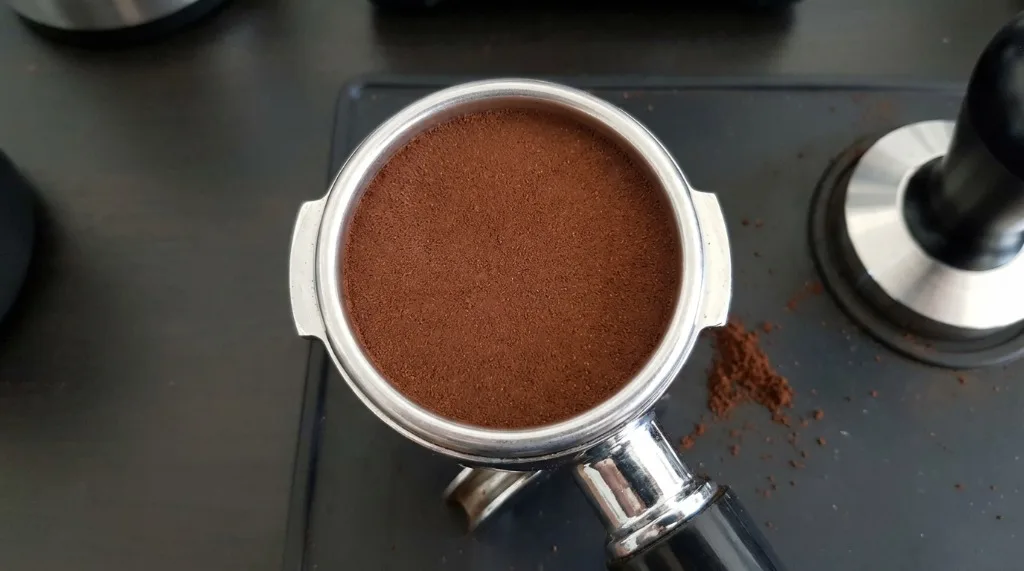
- For standard double basket: 18-19g
- For single basket: 8-10g
- Coffee should fill basket to just below rim after tamping
2. Tamping Pressure and Levelness
Tamping matters less than grind, but weak or uneven tamps cause problems.
Weak Tamp:
- Leaves air gaps in puck
- Water finds gaps, rushes through
- Fast, uneven extraction
What to do:
- Tamp firmly until coffee stops compressing. You’ll feel it “bottom out.”
- You can’t over-tamp (coffee is already compressed), but you can definitely under-tamp.
- Keep it level. Angled tamp creates thin side where water races through.
3. Stale Beans
This is the silent killer.
Old beans (roasted more than 3-4 weeks ago) have off-gassed their CO2. That CO2 creates resistance during extraction and forms crema.
Signs of stale beans:
- No matter how fine you grind, shot gushes
- Espresso looks black/watery with no foam
- Very little crema that disappears in seconds
- Taste is flat and dull—not sour or bitter, just nothing
What to do:
- Buy beans with “Roasted On” date, not “Best By”
- Use within 2-4 weeks of roasting
- Buy from local roasters who roast weekly
- Store airtight, away from light and heat
Puck Preparation: Prevent Channeling
Sometimes average flow is right, but water drills a hole through one part of the puck, causing a sudden gush.
What is Channeling?
Water finds a weak spot in the puck. Instead of flowing evenly, it carves a path through that weak spot. Result:
- Part of coffee is over-extracted (bitter)
- Part is under-extracted (sour)
- Shot runs faster than it should—water took a shortcut
How to Prevent Channeling
1. Distribution (WDT Technique)
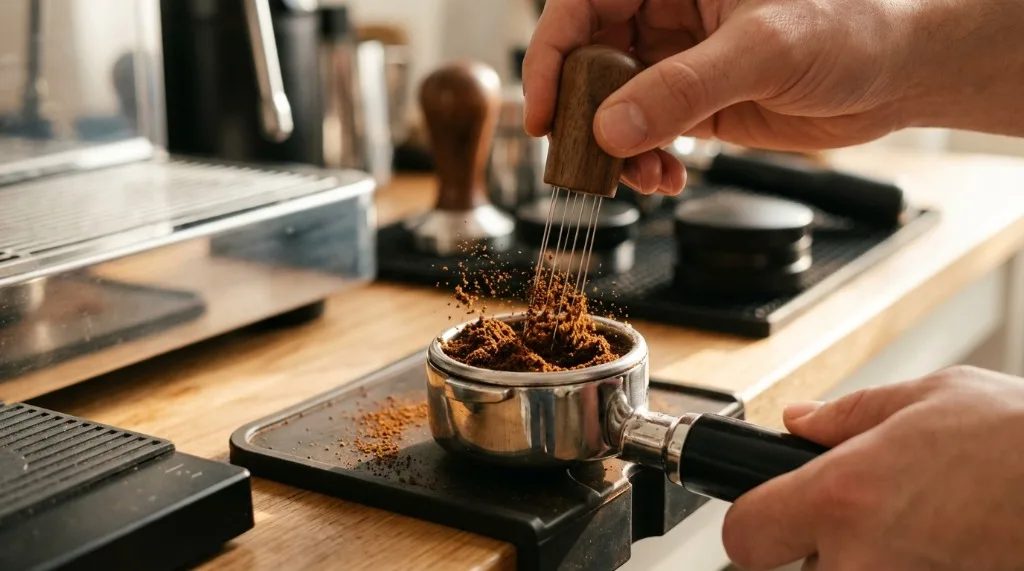
Before tamping, use needle tool to stir grounds in basket.
- Breaks up clumps (super common with built-in grinders)
- Ensures even density across entire puck
- Clumps are high resistance spots—water avoids them, channels around
2. Level Tamping
If tamp is crooked:
- One side compressed more than other
- Water races down the shallow side
- Uneven extraction, faster flow
Consider a self-leveling tamper if this is a struggle.
3. Keep Basket Dry
Water on basket before dosing creates channels.
- Always wipe basket dry after flush
- Water droplets = spots of zero resistance
Troubleshooting Checklist
Work through this systematically:
Check 1: Basket Type
Using Single Wall (Non-Pressurized) basket?
Non-pressurized baskets require proper fine grind. Pre-ground coffee is too coarse—shot will gush.
Options:
- Switch to Dual Wall (Pressurized) basket—has built-in restriction for pre-ground coffee
- Use freshly ground coffee at espresso-fine setting
Check 2: Dosage
- Weigh grounds with scale
- 18g is standard for double basket
- Too little = fast flow
Check 3: Grind Finer
- When in doubt, grind finer
- Keep going finer until you “choke” the machine (almost no flow)
- Then back off 1-2 clicks coarser
- This finds the exact right setting
Check 4: Bean Freshness
- When were beans roasted?
- If you don’t know, they’re probably stale
- New beans = new life
Check 5: Machine Temperature
- Machine fully heated?
- Cold metal = less resistance
- Wait for full temp, run blank shot to heat portafilter
The Dialing-In Process
Finding perfect extraction is called “dialing in.” Here’s how I do it:
Starting Point
- Dose: 18g
- Yield: 36g (1:2 ratio)
- Time: Target 25-30 seconds
- Grind: Middle of your dial range
Adjustment Method
- Pull shot and time it
- Too fast (<22s)? Grind finer by 1 full number
- Purge old grounds, pull again
- Too slow (>35s)? Grind coarser by 1 number
- Repeat until you hit target time
- Taste. Adjust dose or yield if needed.
Keep Notes
I keep a simple log:
- Bean name
- Roast date
- Grind setting (internal + external)
- Dose weight
- Shot time
- Taste notes
When switching beans, I have a reference point.
Common Mistakes That Cause Fast Shots
Mistake 1: Using Pre-Ground Coffee
Pre-ground “espresso” from supermarket is too coarse for unpressurized baskets. Use pressurized basket, or switch to whole beans.
Mistake 2: Not Weighing Dose
“Eyeballing” is wildly inconsistent. A gram or two changes shot time by several seconds.
Mistake 3: Adjusting Too Timidly
One click often isn’t enough. Don’t be afraid to move 2-3 clicks, especially when far from target.
Mistake 4: Ignoring Bean Age
Fresh for one week, stale for rest of bag. Beans degrade. Dial in again as they age.
Related Guides:
Mikael
Home espresso enthusiast and Breville specialist. Helping you master the art of coffee brewing from your own kitchen.
Learn more about me →