Latte Art Troubleshooting Guide
Fix common latte art problems on your Breville. Solutions for milk texture issues, pour mistakes, and pattern failures.

My first hundred attempts at latte art produced the same result: a sad brown blob surrounded by white foam islands. I watched YouTube videos, copied the wrist movements exactly, and still—blob. Every. Single. Time.
It took months to figure out that my problem wasn’t technique. It was milk texture. Bad microfoam will defeat perfect pouring technique every time.
If you’re struggling with latte art troubleshooting on your Breville, you’re probably making one of the mistakes I made. Let me help you diagnose and fix them.
Understanding What Good Milk Looks Like
Before we troubleshoot, let’s define the goal. Perfect steamed milk for latte art should be:
- Glossy – looks like wet paint, not matte
- Smooth – no visible bubbles, completely uniform
- Pourable – flows like thick cream, not chunky
- Integrated – foam and milk are one, not separate layers
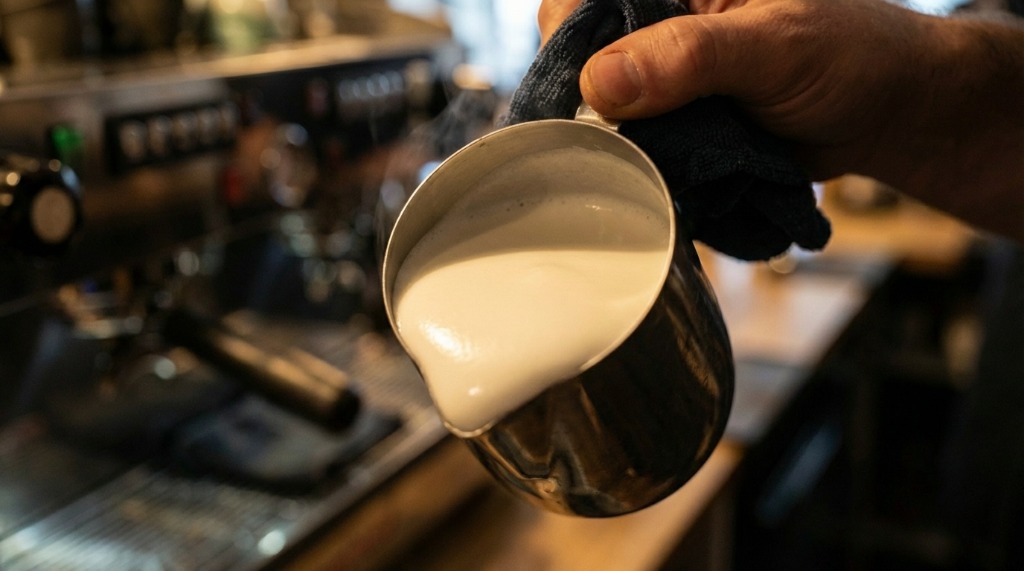 Perfect microfoam should have a glossy, “wet paint” appearance with no visible bubbles.
When you swirl the pitcher, it should spin like a whirlpool. If you tap it and chunks float up, start over.
I spent weeks producing milk that looked “good enough” but never poured well. The difference between acceptable and excellent microfoam is subtle visually but massive when pouring.
Problem: Milk is Too Foamy (Stiff, Separated)
This was my first mistake. Big, visible bubbles. Stiff foam that sat on top while thin milk poured out. Classic cappuccino territory when I wanted latte art.
 Stiff, bubbly foam like this acts as a barrier, preventing you from pouring delicate patterns.
Cause
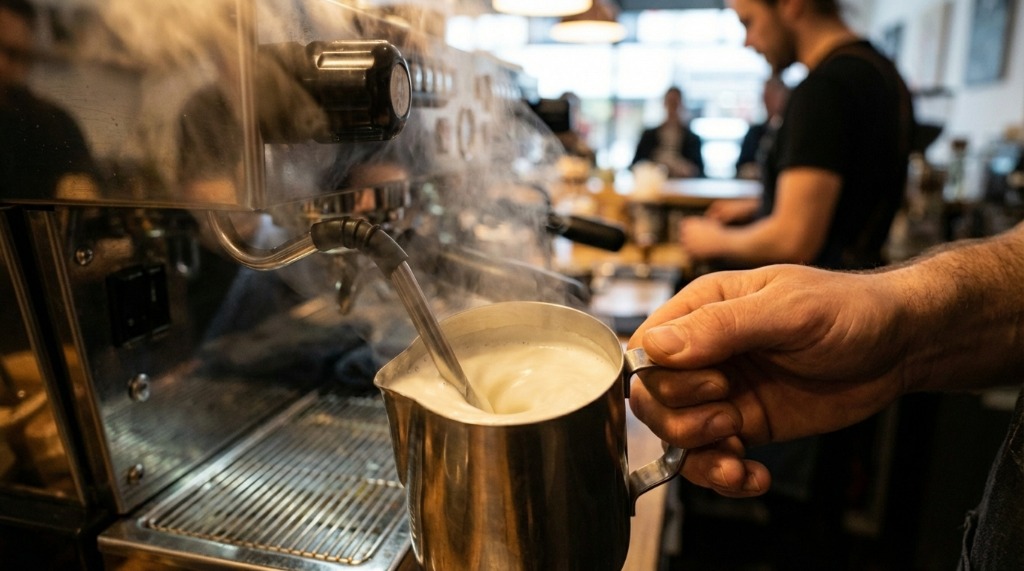
You stretched (aerated) the milk too long. That “sssss” sound adding air should last only 3-5 seconds for a latte. After that, you’re making foam, not microfoam.
Fix
- Stop stretching earlier – For a 12oz drink, I stretch for about 3 seconds, just until the milk increases maybe 25% in volume
- Submerge the wand faster – Once you hear the paper-tearing sound, drop the tip below the surface
- Create a whirlpool – Position the wand off-center to spin the milk, integrating air you’ve added
My rule: Less air than you think, more spinning than you expect. You can always add more air if the texture is too thin, but you can’t remove excess foam.
For steaming fundamentals, check my microfoam frothing guide.
Problem: Milk is Too Thin (No Texture)
The opposite problem. Pours like regular milk. No foam at all. Your “art” sinks immediately.
 If your milk has no texture, it will sink straight to the bottom of the cup, leaving nothing on the surface to draw with.
Cause
You didn’t add enough air during the stretching phase. Maybe you submerged the wand before hearing that “sssss” sound, or your tip was too deep from the start.
Fix
- Start with tip at surface – Just barely breaking the milk surface
- Listen for the sound – A sharp “sssss” or paper-tearing indicates air entering
- Stretch longer – Add 1-2 more seconds of aeration before submerging
- Lower the pitcher – As foam builds, drop the pitcher slightly to keep the tip at the surface
If your Breville’s steam power is weak, you may need to wait longer between brewing and steaming. The boiler needs time to recover. Check my steam wand basics for technique details.
Problem: Bubbles Remain After Steaming
You’ve finished steaming, but there are visible bubbles on top. These will ruin your pour.
Cause
Either you stretched too aggressively (big air introduction), or you didn’t create enough whirlpool motion to integrate the foam.
Fix
Immediate fixes:
- Tap the pitcher firmly on the counter—several times if needed
- Swirl aggressively until bubbles disappear
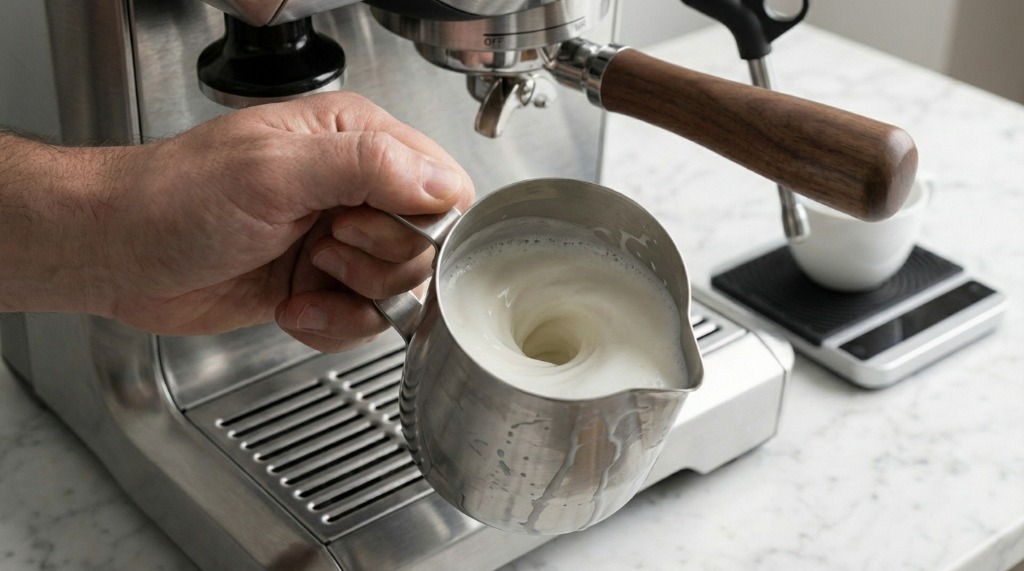 Aggressive swirling helps to incorporate any remaining surface bubbles back into the microfoam for a silky finish.
- If bubbles persist, use a spoon to scrape them off (not ideal but saves the drink)
Prevention:
- Stretch gently—smaller “sssss” sound
- Position wand off-center so milk spins
- Keep the velocity going until you hit temperature
I used to stretch with the wand dead-center. Switched to an off-center position, and my bubbles disappeared overnight.
 Positioning the steam wand slightly off-center creates a vortex that incorporates air bubbles into a smooth microfoam.
Problem: Latte Art Sinks Immediately
This is heartbreaking. You pour what looks like a decent pattern, set the cup down, and watch your design vanish within seconds.
 If your patterns look muddy or disappear, it’s usually due to thin crema or under-stretched milk.
Cause
Your espresso crema is too thin, or the milk texture isn’t holding enough air. Sometimes both.
Fix
Espresso fixes:
- Use fresher beans (7-14 days off roast)
- Check your dose—underdosing produces thin crema
- Grind finer if shots are running too fast
If your espresso pours with good crema but art still sinks, the milk is likely too thin. Add more stretching time.
Milk fixes:
- Stretch slightly longer for more body
- Pour immediately after steaming—waited milk separates
- Swirl the pitcher right before pouring to reintegrate
For crema troubleshooting, see my no crema troubleshooting guide.
Problem: Can’t Control the Pour
Milk comes out too fast. Or too slow. You can’t place the design where you want it.
Cause
Pitcher angle and height control. This is pure technique.
Fix
Too fast:
- Raise the pitcher higher from the cup
- Tilt the pitcher less aggressively
- Pour from the back of the spout, not the middle
Too slow:
- Get closer to the cup surface
- Commit to the pour—hesitation breaks flow
- Make sure milk texture isn’t too thick (overstretched)
My breakthrough came when I realized I was pouring from too high. Get the spout close to the crema—like 1 inch away—when you want the pattern to appear. Height controls width and penetration.
Problem: Heart Shape Won’t Form
The most basic pattern, yet frustrating to nail.
Cause
Usually a combination of milk texture issues and pour technique.
Fix
The heart pour step-by-step:
- Start pouring from 3-4 inches high, dead center
- Fill the cup halfway with a steady, thin stream
- Drop the pitcher close to the surface (1 inch)
- Tilt the cup back level as you pour faster
- Wait for a white circle to form on the crema
- Strike through the circle by lifting and moving forward
- The drag creates the heart point
 A visual breakdown of the heart pour: from filling the base to the final strike-through.
Common mistakes:
- Striking too early (pattern hasn’t formed)
- Striking too hard (breaks the design)
- Not tilting the cup enough at the start
- Poor milk texture (can’t pour onto surface)
I practiced hearts for two weeks straight before they looked decent. Consistency comes from repetition.
Problem: Rosetta Petals are Uneven
You’re getting petal shapes, but they’re lopsided, too big, or irregular.
Cause
Wrist wiggle speed isn’t consistent, or you’re moving backward too quickly.
Fix
- Wiggle at consistent speed – each movement should be even
- Move backward slowly – petals form as you move toward yourself
- Start the wiggle only when close to surface – not from height
- Keep the pitcher moving – stopping creates gaps
 A professional rosetta pour requires precise wrist movement and a steady backward retreat to form even petals.
The rosetta took me longest to learn. What helped: counting “1-2-3-4-5” as I wiggled, forcing myself to maintain rhythm. Also, practicing with water in a cup to build muscle memory without wasting milk.
 Common rosetta mistakes include uneven wiggles and lopsided movement, often caused by inconsistent wrist speed.
Problem: Monk’s Head Pattern Failing
Trying to pour the tulip stack? The bulbs don’t separate cleanly.
Cause
Timing and positioning. Each push needs to start and stop decisively.
Fix
- Pour first bulb, let it form, then stop
- Move backward slightly
- Push new milk into the previous bulb—this shoves it forward
- Repeat for each layer
- Strike through at the end
 A successful tulip stack (Monk’s Head) requires decisive stopping and starting between each layer.
The key is stopping between layers. Many people pour continuously, hoping layers separate magically. They won’t. Stop. Move. Push. Stop.
See my latte art monks head guide for the full technique breakdown.
Temperature Issues
Too Hot (Scalded Milk)
Signs: milk smells burned, texture is foamy and weird, no shine.
Fix: Stop steaming at 140-150°F (60-65°C). If you’re going by hand feel, stop when the pitcher is uncomfortably hot to hold—but not painful.
Too Cold (Understeamed)
Signs: milk is lukewarm, foam separates quickly, art doesn’t hold.
Fix: Steam longer. The milk needs to hit 140°F minimum for proteins to properly integrate. Cold foam doesn’t have the structure for latte art.
For precise temperature technique, check my milk temperature guide.
Equipment Factors
Steam Wand Tip Clogged
If steam pressure seems weak, the tip might be partially blocked. Milk residue builds up in those tiny holes.
Fix:
- Purge after every use
- Wipe with a damp cloth immediately after steaming
- Soak in hot water if buildup is severe
- Use a pin to clear blocked holes
See my steam wand blocked guide for cleaning steps.
Wrong Pitcher Size
Using a 20oz pitcher for a single 8oz latte makes steaming harder. Too much empty space.
Rule of thumb: Choose a pitcher that’s filled roughly 1/3 with milk after stretching. This gives room for expansion plus space to create a whirlpool.
I use a 12oz pitcher for single drinks, 20oz for doubles.
Practice Routine
Improving latte art is repetition. Here’s my practice schedule when I was learning:
Daily:
- 2-3 drinks focusing on milk texture only (not patterns)
- Observe the swirl, the shine, the pour behavior
Weekly:
- 10 heart attempts back-to-back (water practice works too)
- Film yourself pouring to spot issues
Monthly:
- Try a new pattern (rosetta, tulip, swan)
- Compare current work to month-ago photos
Progress is slow. My first decent heart took 6 weeks. My first acceptable rosetta took 3 months. Keep at it.
Conclusion
Latte art problems almost always trace back to milk texture. Master your microfoam first—glossy, smooth, integrated. The pouring technique comes easier when your milk cooperates.
Key takeaways:
- Stretch for 3-5 seconds only (for lattes)
- Create a whirlpool to integrate foam
- Pour immediately after steaming
- Get the spout close to the crema for patterns
- Tap and swirl to remove visible bubbles
Don’t get discouraged by blobs. Every home barista started there. Keep practicing, keep swirling, and one day it’ll click.
What’s your biggest latte art struggle? Share below—maybe I can help troubleshoot!
Mikael
Home espresso enthusiast and Breville specialist. Helping you master the art of coffee brewing from your own kitchen.
Learn more about me →