Microfoam vs. Soap Bubbles: Fixing Common Frothing Mistakes
Learn the difference between microfoam and soap bubbles. Fix common milk frothing mistakes for latte art quality texture.
A great latte is 50% espresso, 50% texture. I spent months pulling perfect shots, only to ruin them with 1980s bubble-bath foam. My latte art attempts looked like blobs of shaving cream floating in brown water.
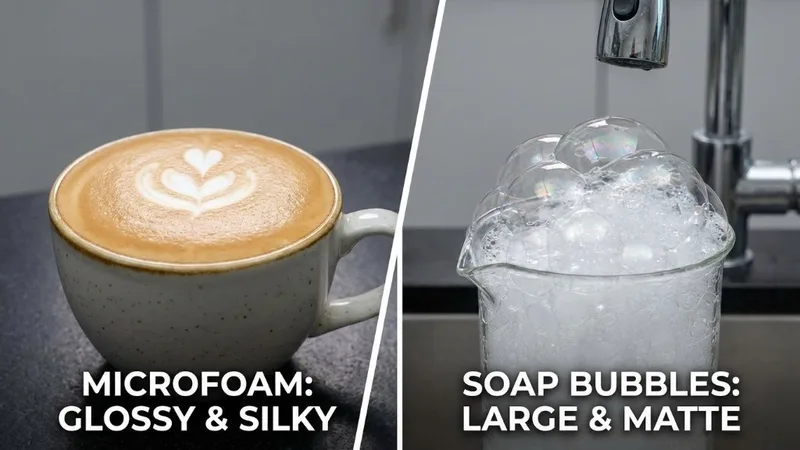
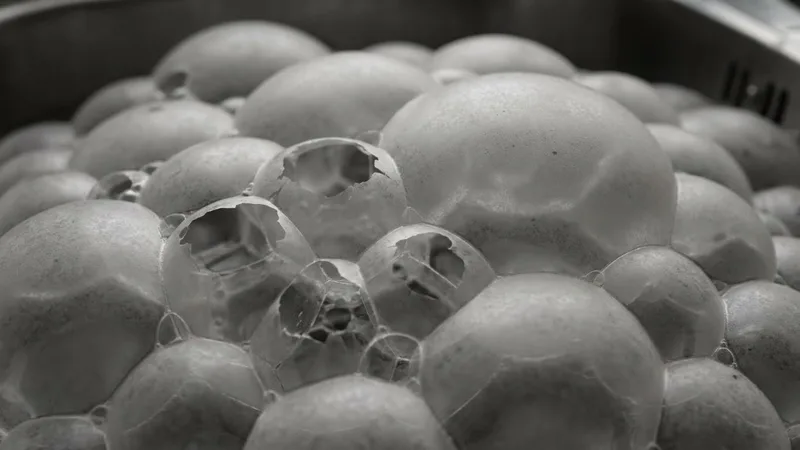
The goal is microfoam—milk so silky and glossy it looks like wet white paint. The enemy is soap bubbles—dry, airy foam that tastes like cardboard.
Transitioning from “froth” to “microfoam” is the biggest level-up for a home barista. Here’s how to stop making soap bubbles.
What Is Microfoam?
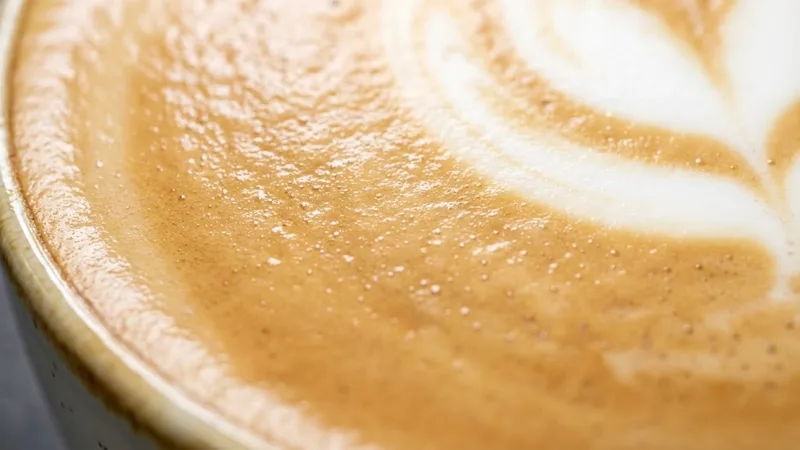
Microfoam is milk with bubbles so microscopic you can’t see them. It’s fluid, heavy, and glossy.
Visual Cheat Sheet
| Microfoam | Soap Bubbles |
|---|---|
| Glossy, reflects light | Matte, dry, dull |
| Moves like heavy cream | Stiff, moves like meringue |
| Zero visible bubbles | Big visible bubbles |
| Pours in silky ribbons | Plops onto coffee |

| Holds intricate art | Art blobs and disappears |
Taste Test
- Microfoam: Sweet (lactose is better sensed), velvety mouthfeel.
- Soap Bubbles: Dry foam followed by hot watery milk. Disconnected.
Why Soap Bubbles Happen
Usually, it’s one of these 3 subtle mistakes:
1. The “Paper Tear” Lasts Too Long
The Issue: You keep the tip at the surface ripping air into the milk for 10-20 seconds. Result: Too much air. Bubbles can’t break down.
The Fix: Air is ONLY for the first 3-5 seconds. Count it: One, two, three… DIVE. Once submerged, no more ripping sound. Just spinning.
2. No Vortex (The Whirlpool)
The Issue: Wand is dead center. Milk is bubbling up but not spinning. Result: Large bubbles stay large because they aren’t being pulverized by the cyclone.
The Fix:
- Offset the wand to the side.
- Tilt the pitcher.
- Find the angle where milk whips around in a circle. That violence is what polishes the texture.
3. Boiling the Milk
The Issue: Steaming until the pitcher burns your fingerprints off. Result: Proteins break down. Foam structure collapses. Tastes like cooked egg.
The Fix: Stop at 60-65°C. Rule of thumb: When the pitcher is too hot to hold for more than a second, STOP immediately.
4. Dirty Wand
The Issue: Old milk crust inside the tip. Result: Diverts steam jet, ruins vortex. Gross.
The Fix: Purge. Wipe. Always.
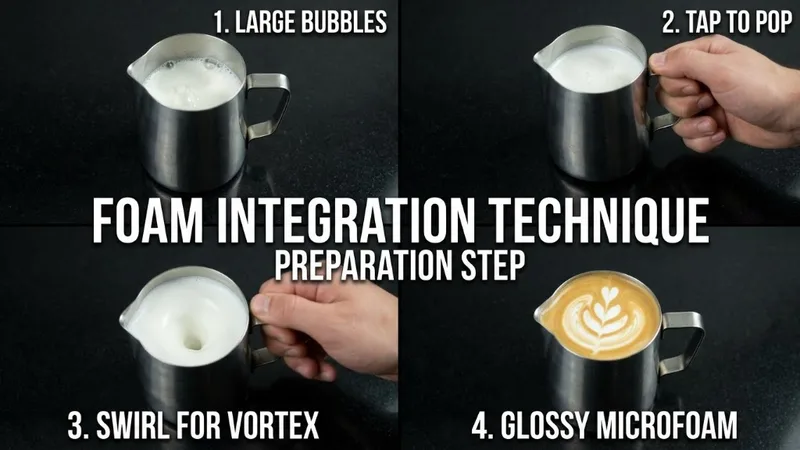
Step-by-Step Perfect Microfoam
This is the workflow that fixed my texture:
Preparation
- Cold Milk: Straight from fridge gives you more time to steam.
- Cold Pitcher: Helps too.
- Purge Wand: Don’t inject condensation water into your milk.
The Process
Phase 1: Stretching (The Air Phase)
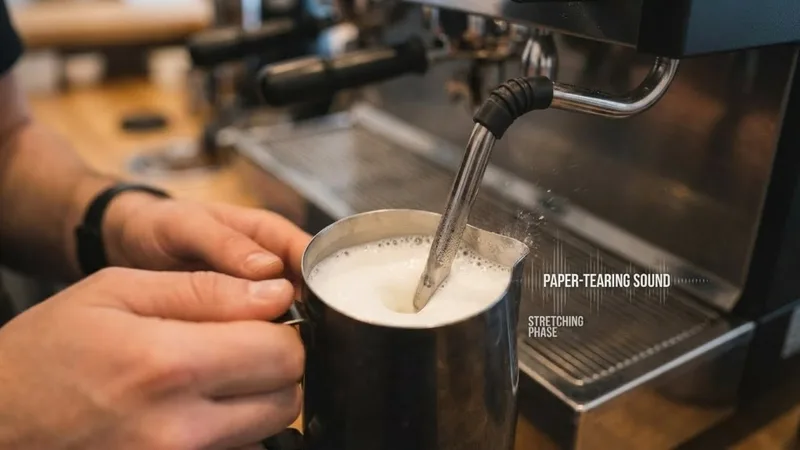
- Tip barely touching surface.
- Open steam full power.
- Tshh-tshh-tshh (paper tearing sound).
- Do this for 3-5 seconds max (volume rises ~20%).
Phase 2: Texturing (The Spin Phase)
- Raise pitcher slightly to bury the tip (no more tearing sound).
- Find the vortex.
- Let it spin silently. This chops the big bubbles into microbubbles.
- Hold until pitcher is hot (~140°F).
- Cut steam.
After Steaming (The Polish)
- Purge & Wipe.
- The Thump: Whack pitcher on counter to pop any surviving big bubbles.
- The Swirl: Swirl milk vigorously. It should look like chrome/wet paint.
- Pour immediately. Microfoam separates in 30 seconds.
Troubleshooting Guide
”I have a thick foamy cap on thin milk.”
Cause: You didn’t swirl enough, or you stretched too long and didn’t texture enough. Fix: shorter stretch phase, longer vortex phase. Swirl like crazy before pouring.
”It’s screaming loudly.”
Cause: Tip too deep. You aren’t adding air, just boiling milk. Fix: Lower pitcher until you hear the whisper/tear.
”Foam collapses instantly.”
Cause: Too hot, or old milk. Fix: Stop steaming sooner.
”Burnt taste.”
Cause: Way too hot. Fix: Calibrate your hand with a thermometer for a few days.
The Swirl and Tap Technique
Never skip this. Freshly steamed milk often has a few rogue bubbles. THUMP - bubbles die. SWIRL - milk becomes uniform.
If you don’t swirl, the heavy milk goes to the bottom and foam stays top. You want them married.

Practice Tips
The Soap Hack
Don’t waste expensive milk.
- Water + 1 drop dish soap.
- Steam it.
- It behaves almost EXACTLY like stiff milk.
- Perfect for practicing the vortex without crying over spilled milk cost.
The Observation Log
For one week, write down:
- Stretch time (sec)
- Total time (sec)
- Result (Too thin / Good / Soap bubble bath)
You’ll find your machine’s sweet spot (usually ~4s stretch).
Key Takeaways
- Microfoam = Wet Paint. Not bubble bath.
- Stretch early. First 20% of time.
- Texture late. Spin the rest of the time.
- Stop early. Too hot to hold = too hot.
- Groom. Thump and swirl to fix mistakes.
Once you get it once, you’ll know the feeling. It pours silently and looks like silk. Keep practicing.
Related Guides:
Mikael
Home espresso enthusiast and Breville specialist. Helping you master the art of coffee brewing from your own kitchen.
Learn more about me →