Pre-Infusion: What It Is and How to Control It on Breville
Learn what pre-infusion is in espresso and how to manually control it on your Breville machine for better shots and reduced channeling.
Pre-infusion is the secret weapon against channeling. It sounds like fancy coffee nerd jargon, but it’s simpler than you think: wet the coffee gently before you blast it.
Think of it like watering dry soil in a garden. If you hit dry dirt with a firehose, the water just splashes everywhere and digs holes. If you mist it gently first, the soil absorbs the water and prepares for the flow.
Your Breville does this automatically, but taking manual control can save a bad shot—especially with light roasts.
What is Pre-Infusion?
It’s a low-pressure start. Instead of hitting the puck with the full 9 bars of pressure instantly, the machine pushes water at low pressure (2-3 bars) for a few seconds.
The Science Behind It
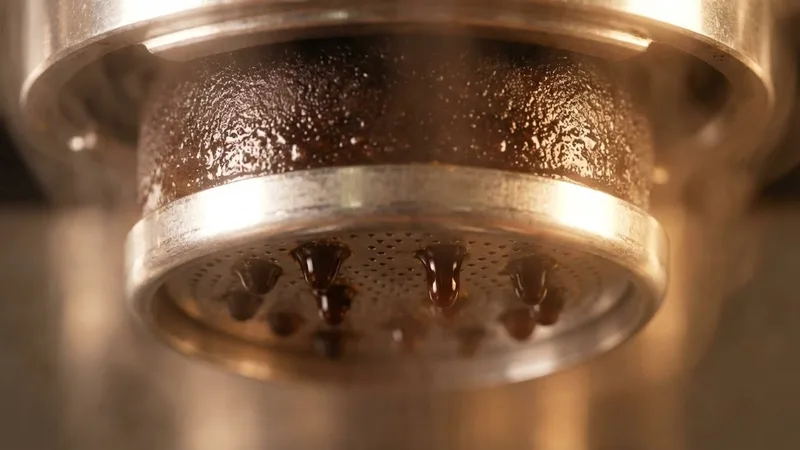
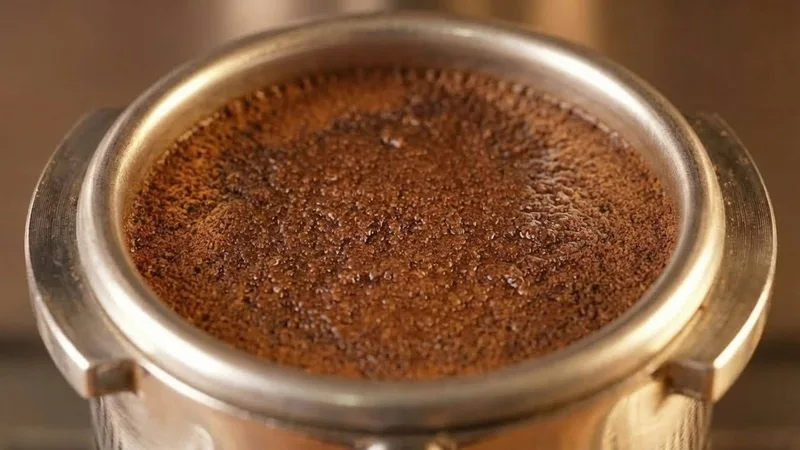
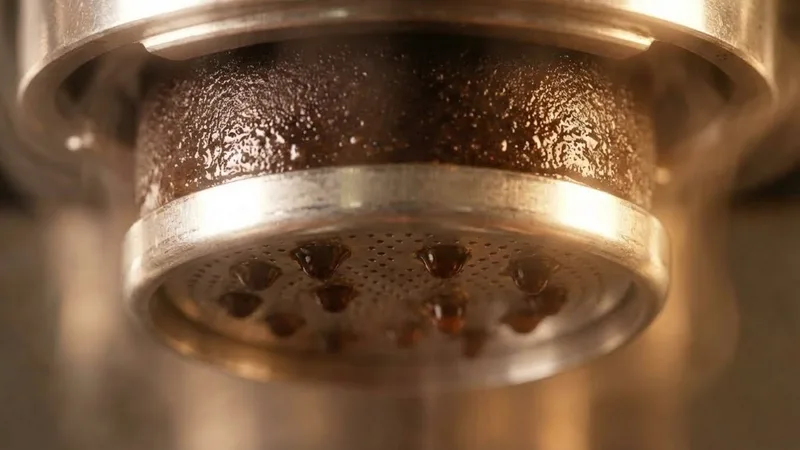
Dry coffee is stubborn. It repels water initially. Pre-infusion allows water to seep into the air pockets, causing the grounds to swell and fuse together into a solid cake (puck).

Why this matters: A solid, wet puck resists channeled water. A dry puck is full of cracks waiting to happen.
Pre-Infusion on Breville Machines
Automatic Mode
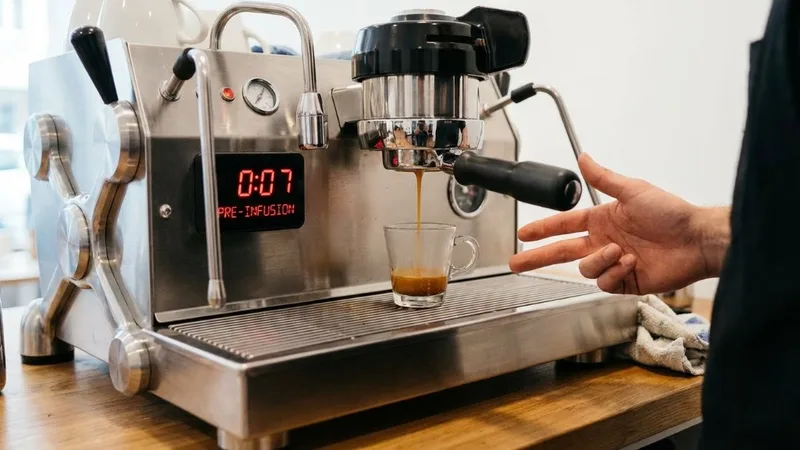
Breville is smart. By default, it does a ~7 second pre-infusion ramp-up. You hear the pump humming quietly (bzzzz) before it kicks into full gear (BRRRRR).
For 80% of beans (medium/dark roasts), this stock setting is perfect. Don’t touch it.
Why Go Manual?
Sometimes you need more. Light Roasts: These are dense and hard to extract. They benefit from a long (10-15s) soak to soften them up. Channeling Issues: If you’re struggling with spurts and sprays, a longer pre-infusion can glue the puck together better.
How to Manually Control Pre-Infusion
This is the cool part. You can “drive” your machine manually.
The “Hold the Button” Technique
- Press and HOLD the shot button (1-cup or 2-cup).
- The pump will engage at low pressure. It will stay here as long as you hold the button.
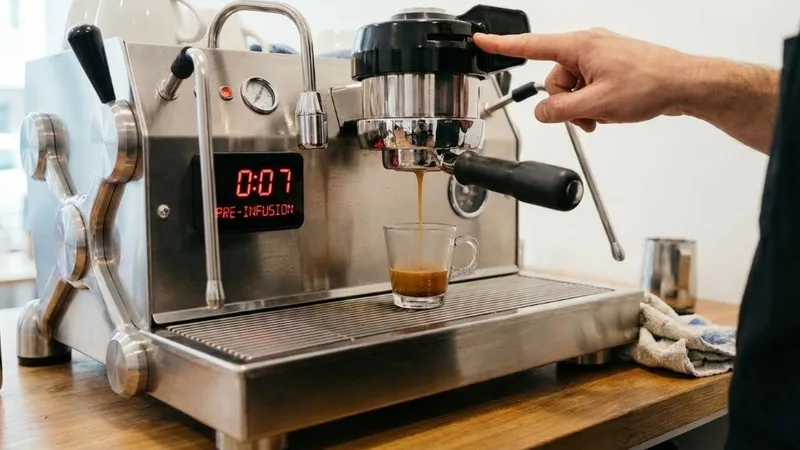
- Release the button when you want full pressure to start.
- The machine effectively ramps up to full pressure.
- Press the button again to stop the shot manually (unless you have a programmed volume, but in manual mode, you usually stop manually).
My Workflow:
- Hold button. Count: 1, 2, 3, 4, 5, 6, 7.
- Watch for first drops.
- Release button.
- Let it flow until I hit my target weight (36g).
- Tap button to stop.
Adjusting for Different Roasts
Dark Roasts: Keep it short. 2-3 seconds. They extract easily. Long pre-infusion makes them bitter. Medium Roasts: 5-7 seconds. Standard. Light Roasts: Go long. 10+ seconds. I’ve done 20-second pre-infusions on stubborn Ethiopian beans to get the acidity under control.
Benefits of Extended Pre-Infusion
1. The Channeling Killer
If your distribution skills are… mediocre… pre-infusion helps cover your mistakes. It settles the puck before the violence of high pressure begins.
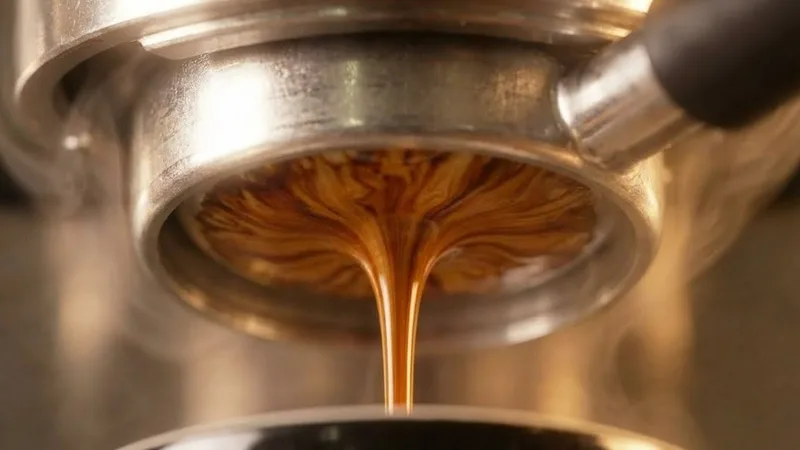
2. Higher Extraction
More water contact time = more flavor extracted. This helps avoid “sour” shots.
3. Allows Finer Grinding
Because the puck is softened, you can grind slightly finer without choking the machine. Finer grind = more flavor.
Common Pre-Infusion Mistakes
The “Slayer Shot” Mistake
Some people try to pre-infuse for the WHOLE shot. This doesn’t really work on a vibe-pump machine like the Barista Express. The pump isn’t designed for sustained low pressure and might heat up. Plus, the pressure often ramps up slowly anyway.
Inconsistent Timing
If you manual brew, use a timer. Holding for 5s one time and 10s the next will make your coffee taste wildly different.
Confusing Pre-Infusion with Brew Time
Extraction time usually starts when the PUMP starts. If you pre-infuse for 10s, and brew for 20s, that’s a 30s total shot. Don’t panic if your shots run “long” on the timer—the first 10s was gently soaking.
Do You Need Manual Pre-Infusion?
You need it if:
- You brew light roasts.
- Your shots always channel (spray).
- You want to experiment with advanced flavor profiles.
You DON’T need it if:
- You drink dark roast Italian blends.
- You barely have time to make coffee in the morning.
- Your shots taste fine.
Frequently Asked Questions
Which button do I use?
Either 1-cup or 2-cup. In manual mode (holding it), they do the exact same thing.
Why doesn’t my pressure gauge move during pre-infusion?
It’s low pressure! It might barely lift the needle. That’s normal.
Can I skip pre-infusion?
Not easily on a Breville. The pump ramp-up is built-in. And you wouldn’t want to—snap channeling would be terrible.
Does pre-infusion fix bad tamping?
It helps, but it’s not a miracle worker. If you have a crater in your puck, you’re still getting channeling.
Related Guides:
Mikael
Home espresso enthusiast and Breville specialist. Helping you master the art of coffee brewing from your own kitchen.
Learn more about me →