WDT Tool Guide: Better Espresso Distribution
How the Weiss Distribution Technique transforms your espresso. DIY and commercial WDT tools, needle specs, and technique for Breville.
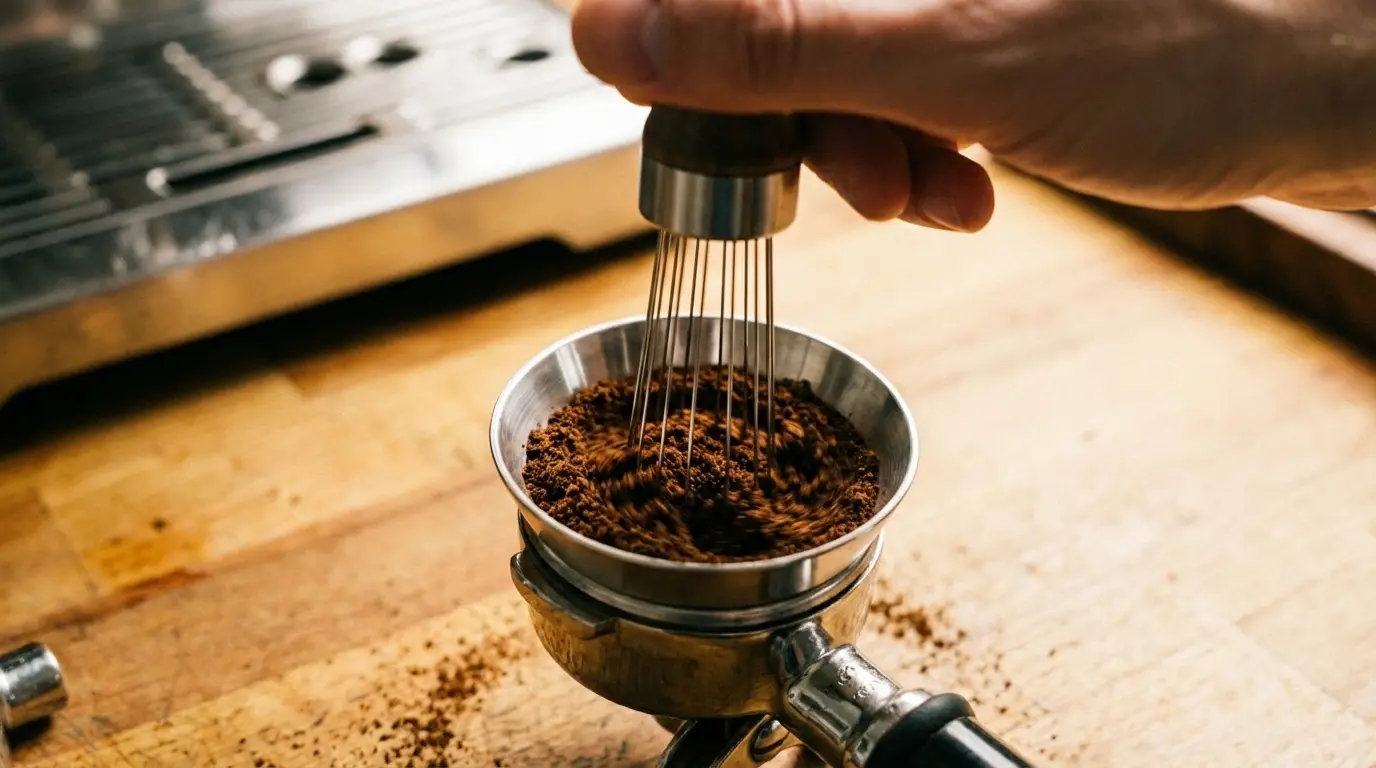
I’ll be honest—when I first heard about stirring my coffee grounds with needles before tamping, I thought it was overkill. Like, seriously? We’re doing acupuncture on coffee now?
Then I tried it. My very first shot after using a WDT tool had zero channeling. The flow was smooth, centered, and the espresso tasted noticeably sweeter. I was hooked immediately.
What Exactly Is WDT?
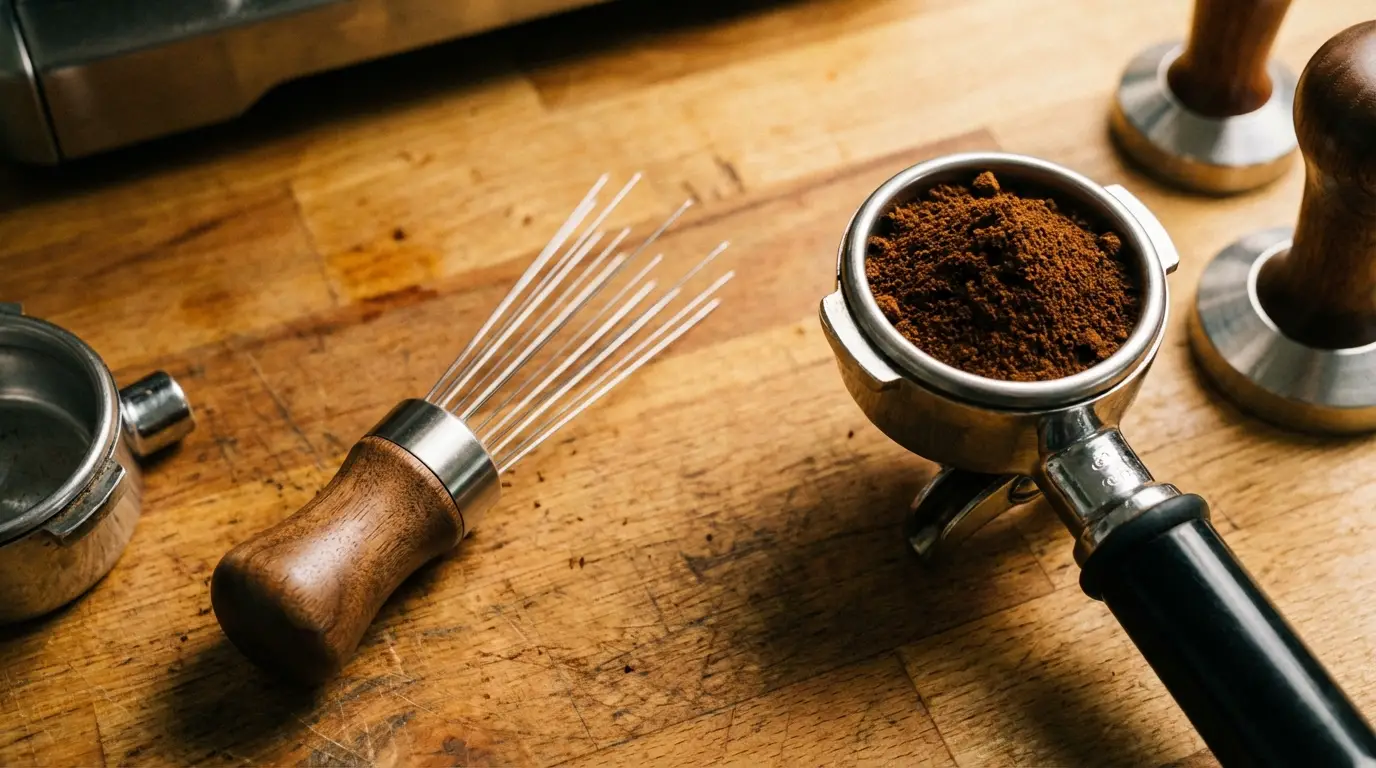
WDT stands for Weiss Distribution Technique, named after John Weiss who first shared the idea on home-barista.com. The concept is almost embarrassingly simple: you stick thin needles into your ground coffee and stir. That’s it.
But why does something so basic make such a huge difference?
Coffee comes out of your grinder in clumps. Some are tiny, some are surprisingly large—and the Breville built-in grinder is particularly bad about this because of static buildup in the chute. These clumps create density variations in your puck. When pressurized water hits those uneven spots, it takes the path of least resistance and channels right through the weak areas.
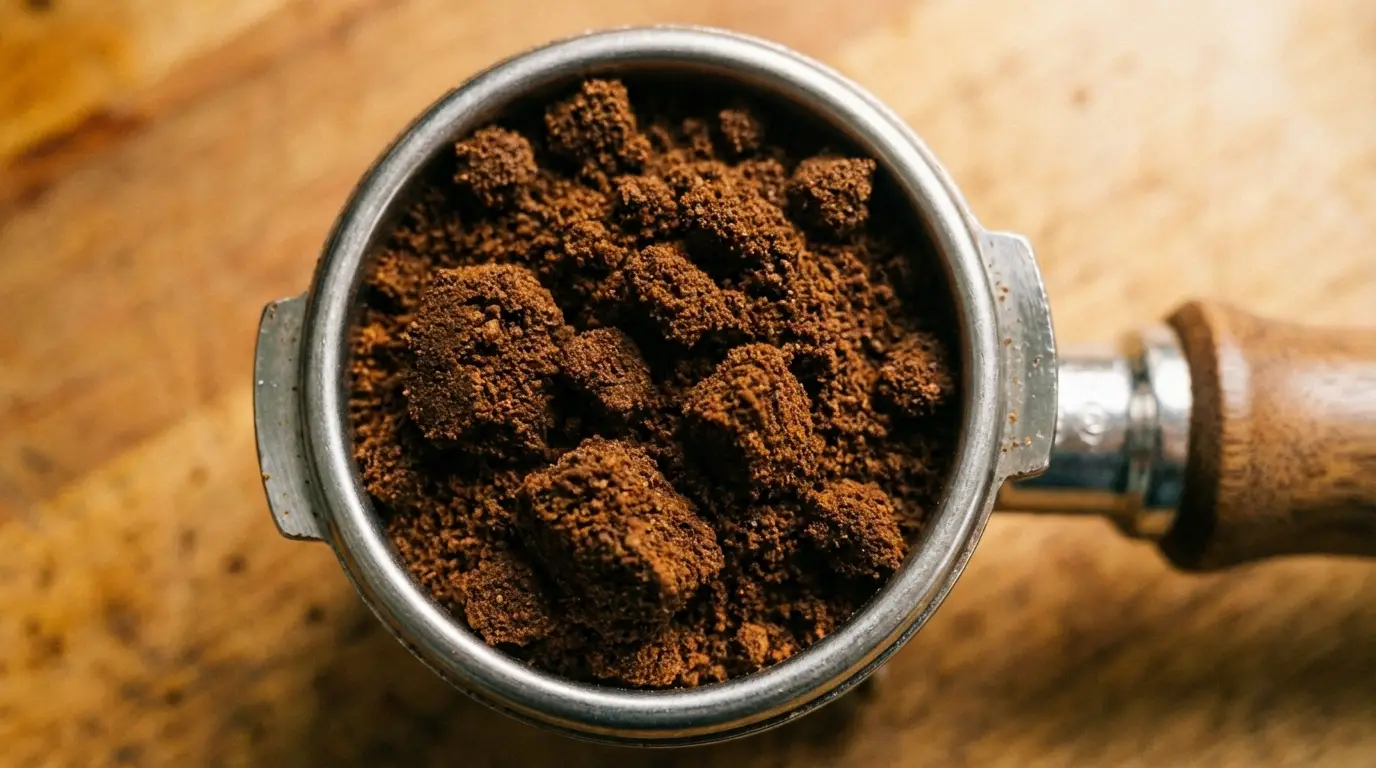
The result? Sour, bitter, or just plain inconsistent espresso that changes from shot to shot even when you haven’t touched a single setting.
Why It Matters More Than You Think
I tracked my shots over two weeks to put actual numbers to the improvement:
| Metric | Without WDT | With WDT |
|---|---|---|
| Extraction time variance | ±5 seconds | ±1.5 seconds |
| Visible channeling | 5 out of 10 shots | 1 out of 10 shots |
| My taste rating | 6/10 average | 8/10 average |
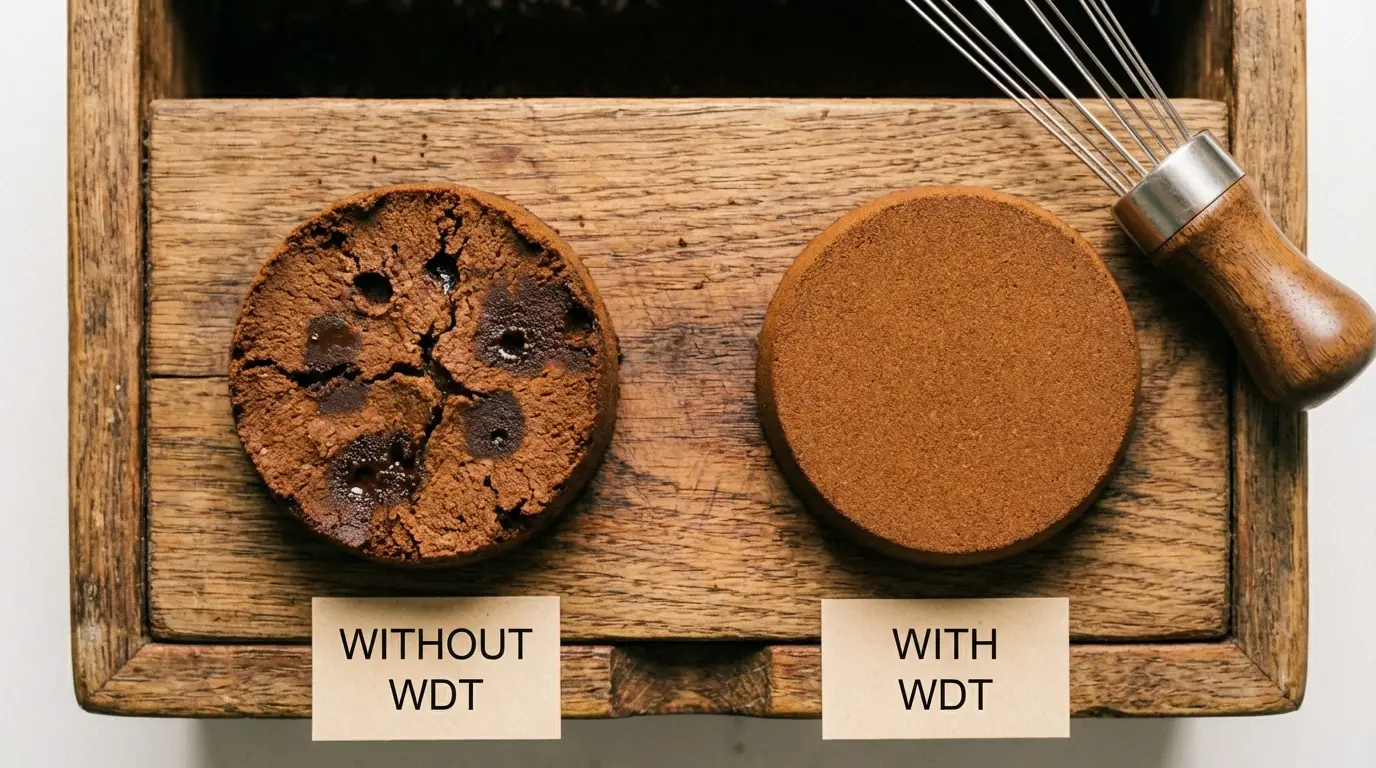
| Puck after extraction | Wet spots, holes | Even, clean surface |
That consistency gain alone is worth the 15 seconds it adds to my workflow. James Hoffmann has called grind distribution one of the most important variables in espresso making—and WDT is the most accessible way to nail it at home.
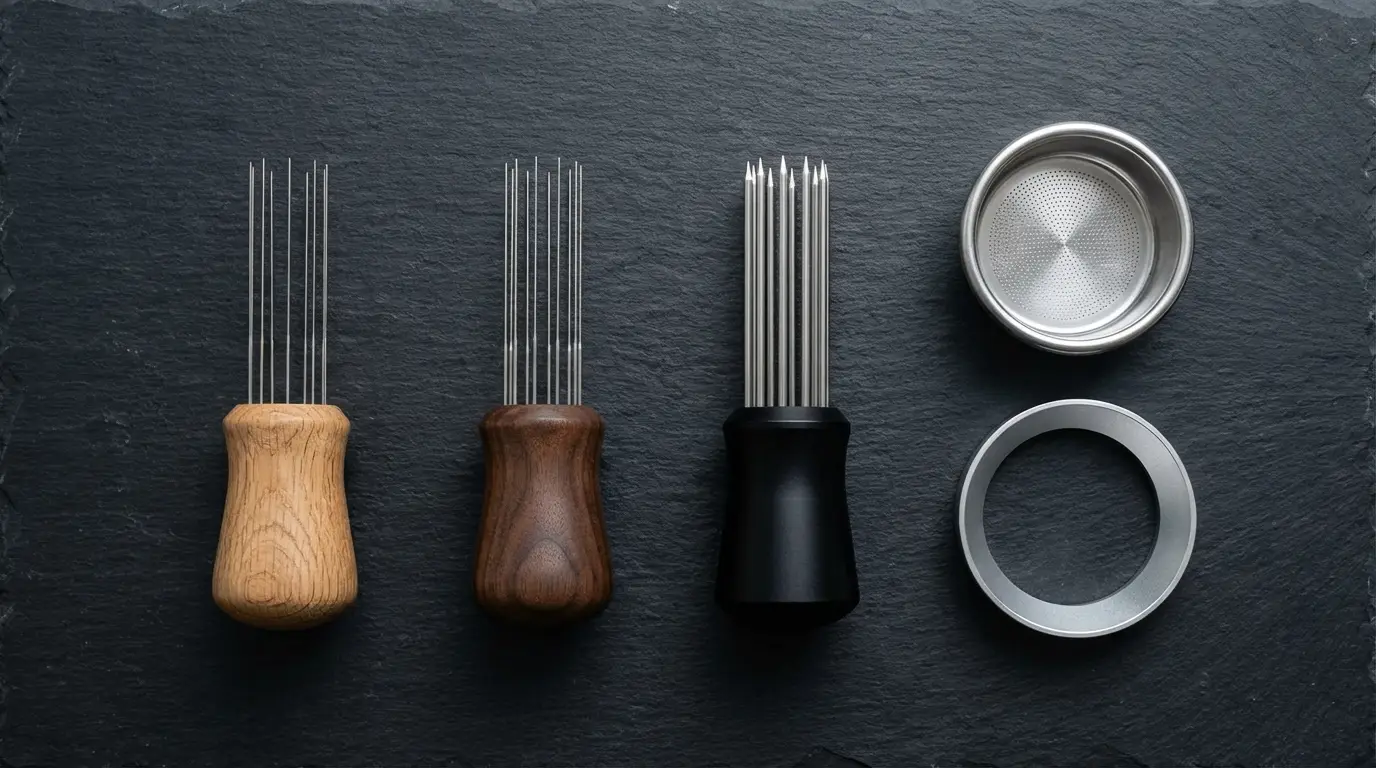
Picking the Right Needle Thickness
This part actually matters a lot. Get the wrong thickness and you’ll either push grounds around without breaking clumps, or snap your needles every other use.
| Diameter | My Take |
|---|---|
| 0.2mm | Breaks too easily—frustrating |
| 0.3mm | The sweet spot. Strong enough, fine enough |
| 0.4mm | Also great. Slightly more durable |
| 0.5mm | Works but you feel it pushing rather than separating |
| 0.6mm+ | Too thick—creates channels instead of fixing them |
Go with 0.3-0.4mm. Anything thicker than that and you’re working against yourself.
For needle count, 5-7 is ideal. Three feels like not enough coverage, and eight or more starts getting crowded in Breville’s smaller 54mm basket.
Commercial WDT Tools Worth Buying
I’ve used a couple of these and researched the rest pretty thoroughly:
| Tool | Needles | Thickness | Price | Quick Verdict |
|---|---|---|---|---|
| MATOW WDT | 7 | 0.4mm | ~$15 | Best bang for buck. My daily driver |
| Normcore V2 | 8 | 0.4mm | ~$25 | Magnetic cap, premium feel |
| Duomo The Eight | 8 | 0.35mm | ~$35 | Beautiful design, top performance |
| BPlus WDT | 9 | 0.25mm | ~$40 | Ultra-fine for perfectionists |
My honest recommendation: The MATOW at $15 does 95% of what the $40 tools do. I’ve used mine for months and it still works perfectly. Save the extra money for better beans.
The DIY Route (Seriously, It Works)
Before I bought the MATOW, I made my own WDT tool for about $3. Here’s how:
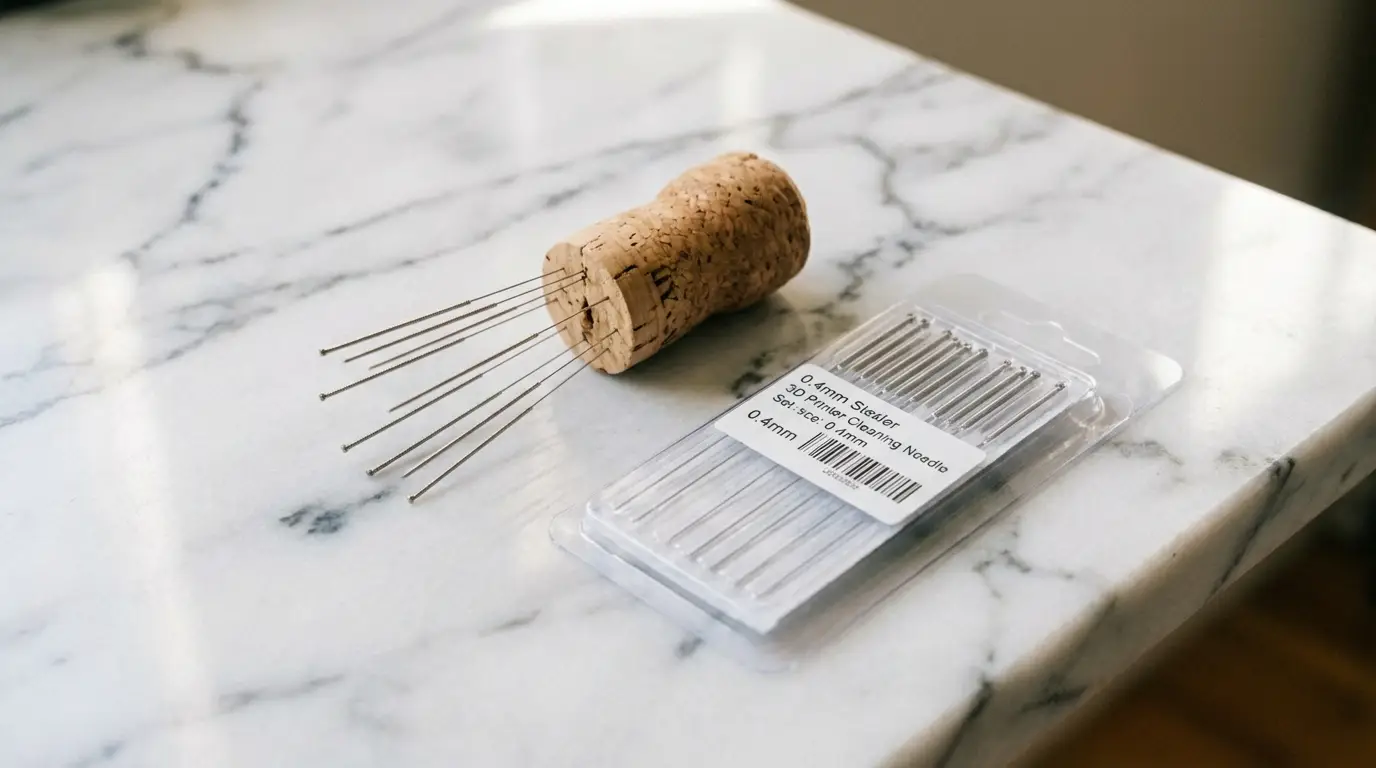
The Cork and Needle Method:
- Grab a wine cork (champagne cork even better—wider base)
- Buy 0.3-0.4mm 3D printer cleaning needles or acupuncture needles off Amazon (~$5 for a pack of 20)
- Push 4-6 needles into the flat end of the cork
- Space them about 5mm apart
- Trim to about 20mm sticking out
It’s not pretty, but it genuinely works. I used my DIY version for three months before upgrading, and my shots were just as good. The Reddit community has dozens of creative DIY solutions—some people even 3D print custom handles from free Thingiverse designs.
How to Actually Use It
Here’s my exact technique, step by step:
- Grind into your portafilter as usual—18g for the Breville double basket
- Put on a dosing funnel (trust me, you want this—WDT without a funnel is messy)
- Insert needles all the way down to near the bottom of the basket
- Stir in small circles, starting from the center and spiraling outward
- Work from bottom to top — this is key. Start deep, gradually work upward
- Do 10-15 passes — takes about 12-15 seconds total
- Finish near the surface with light passes to roughly level things out
- Remove funnel, settle with 2-3 gentle taps, tamp, and go
The Mistakes That’ll Mess You Up
Only stirring the surface. Your needles need to reach the BOTTOM. The worst clumps hide at the base of the basket where you can’t see them.
Being too aggressive. You’re separating particles, not mixing batter. Quick, gentle circular motions—that’s all it takes.
Skipping the dosing funnel. I learned this one the hard way. Without a funnel, grounds end up everywhere. A $10 funnel pays for itself in saved cleanup and wasted coffee within a week.
Not doing enough passes. I see people do 3-4 quick stirs and call it done. That’s not enough. The difference between 5 passes and 15 passes is genuinely visible in your extraction.
WDT vs Other Distribution Methods
You might be wondering whether a spinning distribution tool (those adjustable levelers) does the same thing. Short answer: no.
| WDT | Distribution Tool | |
|---|---|---|
| What it does | Breaks clumps through entire puck | Levels the surface only |
| Depth of effect | Full basket depth | Top 3-5mm |
| Channeling prevention | Excellent | Moderate |
| What it costs | $5-25 | $20-40 |
Distribution tools only work on the top layer. They make things look pretty but do nothing about the clumps hiding underneath. WDT addresses the root cause.
Best combo? WDT first, then distribution tool to level, then tamp. But if you’re only buying one, WDT wins every time.
Breville-Specific Tips
The Static Problem
Breville’s grinder creates an annoying amount of static, especially in dry weather or air-conditioned rooms. This means more clumping than most grinders.
The fix: Try RDT (Ross Droplet Technique)—add literally one tiny drop of water to your beans before grinding. It sounds weird, but it dramatically reduces static. The Reddit espresso community swears by it.
Working in 54mm
Breville’s 54mm basket is smaller than the commercial standard 58mm. A few things to keep in mind:
- Use a tool with 5-6 needles max—more than that gets crowded
- Shorter needle length (15-18mm protruding) works better than long
- A dosing funnel is basically mandatory. The smaller opening means grounds fly everywhere without one.
Do You Actually Need This?
If you’re using single-wall (non-pressurized) baskets on your Breville? Yes. WDT is probably the single highest-impact, lowest-cost upgrade you can make.
If you’re still on pressurized baskets, WDT helps but the basket regulates flow regardless, so you won’t see as dramatic a difference.
And if you’re pulling shots into milk drinks where flavor nuances get masked—WDT still matters, but you might get away with fewer passes.
My personal rule: I WDT every single shot. The 15 seconds it adds has eliminated 90% of my bad shots.
FAQs
Can I just use a toothpick?
Technically, but toothpicks are around 2mm thick—about 5x the ideal diameter. They push grounds around instead of separating them. Spend $3 on proper needles and a cork. The difference is immediate.
How long should WDT take?
10-15 seconds once you’ve got the routine down. My first week it took 30+ seconds because I was being overly careful. Speed comes naturally with practice.
Does WDT replace the Breville razor tool?
They do different things. WDT breaks clumps before tamping. The razor doses excess grounds after tamping. But honestly, if your WDT and dosing are precise (use a scale!), the razor becomes unnecessary. I stopped using mine months ago.
My needles keep bending. What’s wrong?
Either your needles are too thin (below 0.25mm), you’re pressing down too hard against the basket floor, or the quality is poor. Switch to 0.3-0.4mm stainless steel needles and use lighter, circular motions—you shouldn’t be pressing down at all, really.
Key Takeaways
- WDT is the best $5-15 you’ll spend on espresso quality—seriously
- 0.3-0.4mm needles are ideal — too thick pushes, too thin breaks
- Go deep — stir from the bottom of the basket upward
- 10-15 circular passes from center outward covers the whole puck
- Breville’s static grinder benefits enormously from WDT
- DIY works perfectly — cork + needles, done
Related Guides:
Mikael
Home espresso enthusiast and Breville specialist. Helping you master the art of coffee brewing from your own kitchen.
Learn more about me →